Showing posts with label Clover Wonder Clips. Show all posts

Monday 7 December 2015

Allietare Bonnie Hunter Mystery Quilt 2015 - Part 2

Allietare Bonnie Hunter Mystery Quilt 2015 - Part 2
Yes, it is Monday. Yes, I am up-to-date with the Allietare Mystery Quilt 2015.  This is a busy time of year for me at work and if I can keep up at this stage I know I will be able to complete the later stages, so really pleased to be able to get this post up today.

Allietare Bonnie Hunter Mystery Quilt 2015 - Part 2
There was a lot of cutting for Part 2 of the Allietare Mystery Quilt, 454 pieces in all.  Bonnie is wise not to tell us this up front else we might never pick up the rotary cutter. In fact this is why I love her mystery quilts - she dishes it out in achievable parts.
Allietare Bonnie Hunter Mystery Quilt 2015 - Part 2

I happened to buy 20 quilt clips at the Knitting and Stitching Show in Harrogate a few weeks ago, not really knowing what I would be doing with them, but already Bonnie's instructions for us to keep these blocks in set of four has put them to good use.  The 'sets' are making me curious - why do they need to be 'sets'?

Allietare Bonnie Hunter Mystery Quilt 2015 - Part 2
And now for the fun part - pulling out all the puzzle pieces from Part 1 and Part 2 to see what you can make of it.  Here is my effort and I quite like it.  In this photo my neutrals and greys (black) look very similar, but then I am going for a softer look with this quilt.

Allietare Bonnie Hunter Mystery Quilt 2015 - Bonus Triangles
Allietare Bonnie Hunter Mystery Quilt 2015 - Part 2
I chose the 'stitch and flip' method outlined on Bonnie's instructions as I decided that there would be as much waste cutting trapezoids as if I did it this way.  I took the time to add another line of stitching and as a result I have a pile of bonus half square triangles.  They are about 1" square finished.

Here are the stats for Part 2
Part 1 - 8.4% of 7872 sq" (8.4% total)
Part 2 - 14.7% of 7872 sq" (23.1% total)

Joining up with the regular Monday Mystery Link Up at the Quiltville blog!
 

Friday 23 August 2013

Clover Clamshell Accessories Case

Clover Clamshell Accessories Case
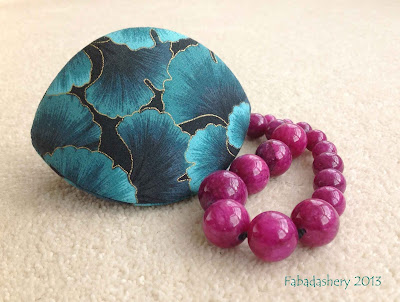
I am still enjoying doing a few small projects, for a quick quilting thrill.  Today I am sharing my Clover Clamshell Accessory Case.  This is a neat little purse which opens and shuts by squeezing the ends.  It shuts quite firmly, so it is ideal for carrying small pieces of jewellery when you are away. When I was fabric shopping in the USA at Cottonwood Quilts, Hutchinson, Kansas, there was a sample on the counter of one of these, which looked so cute that I had to throw one of the kits in to my purchases that day.
Clover Clamshell Accessories Case - Small, Medium, Large
The template kits for these little cases are sold by Clover.  They come in three sizes: small, medium and large.  In the kit are the instructions, three heavier weight plastic outer templates, and three lighter plastic inner templates.  I have to admit, that when I bought it I expected it to be a template which you could copy and use again, but they are sold as the actual templates, or forms.  With a bit of research I have discovered that plastic covers from notebooks, and various weights of acetate sold at stationers will do a similar job.  Like a clamshell, the case snaps shut with the flex in the plastic, so getting the right weight is quite important.

Cutting Fabric for Clover Clamshell Forms
The fabric needs to be cut around the templates with a 1/2 inch seam allowance, as the seam is gathered taut around the form template, and the inner which is slightly smaller.
Sticking wadding to plastic templates - Clover Clamshell Case
To add softness to both the inner and outer plastic forms, you stick on some wadding.  Luckily, I had just trimmed a quilt, and these little bits were just the job.  Being patient, I left them overnight to dry, and then trimmed them exactly the next day.

Lacing fabric around Clover Clamshell Plastic Templates
Next, you stitch a running stitch around the edge of each piece of fabric, with a long, strong thread, which will allow you to put in the template (wadding facing down on the back of the fabric) and gather the seam allowance around it.  Without cutting the thread, you then need to lace the seams together to make the fabric taut around the form. It is a bit fiddly at the points, but don't fret too much, as it won't be seen.
Stitching the outer and inner templates together, with the help of Clover Wonder Clips
With the inners and outers covered, pair them up, wrong sides together.  With the wadding, gathers and plastic, they are quite bulky, so using these little Clover Clips is a neat way to keep them in place whilst you sew them together.  Match up your thread, and using your neatest ladder stitching, fix the inner to the outer, so they become a single side.

Squeeze Opening - Clam Shell Accessories Case
The final shape is like a three-sided rugby ball, so the three flat sides need to be manipulated and sewn to become three-dimensional.  The first two sides are easy enough, but the third, in particular,needs good stitching as it is being done under tension and will have to sustain that tension during its lifetime.The fabric I have chosen for the outside is a jade Ginkgo Tonals by Kona Bay Fabrics, and the inside is a matching colour with a subtle metallic dot.

Clover Clamshell Accessories Case for Jewellery

Joining up with Whoop Whoop Friday! and Crazy Mom Quilts.
 

Saturday 2 March 2013

Nearly Insane Quilt - Block 55

My quilting progress has been limited this week, but I do have a finish to share.  Using my travel time on the train I have been working on Block 55 of my Nearly Insane quilt. It's amazing how much you can get done on just a short journey, but with these little pieces, one false move and they could be travelling the length of the country!
English Paper Piecing on the train
Its a quirky little block, and I quite like it, and I have learnt a few techniques and ideas which will be useful for future blocks. 
Block 55 Nearly Insane Quilt Red and White
Block 55 Nearly Insane Quilt
Overall this block was not too difficult. Extra care was needed to make sure all the right pieces were in the right place. The striped pieces are asymmetrical, so you need to make sure you have got them the correct way around (I know because I had to unpick one!). Also, remembering that the blocks will be on point, I need to take extra care when cutting any directional fabric, to make sure everything is pointing in the right direction - my hearts seem to be all a flutter on this one.
Block 55 Nearly Insane - English Paper Piecing
I know that some future blocks are going to have over three times as many pieces as this block, but I think Block 55 is fairly unique in that the majority of the 46 pieces are all slightly different sizes.  To manage this, I numbered all the papers AND all the pieces of fabric, and for further control I used my Clover Wonder Clips to keep certain groups together.  BTW, I also noticed this week on the Keepsake Quilting website, that Clover are now making these clips in JUMBO SIZE.

Clover Wonder Clips English Paper Piecing
Clover Wonder Clips
So that block marks the completion of the ones chosen in my first draw. Having done this first set, I have had time to think about how to combine my fabrics on forthcoming blocks.  I have also put some thought to the border, sashing and cornerstones. On the side bar there is a thumbnail of the quilt, created in Electric Quilt 5 software, which shows my progress so far.

NUMBER OF PIECES: 46
DIFFICULTY: 3/10
SMALLEST PIECE: Square, 1/2" (7.5mm) x 1/2" (7.5mm)
LARGEST PIECE: Triangle, 1.5" (42mm) x 1.5" (42mm) x 2 5/16" (59m)
TECHNIQUE: English Paper Piecing (EPP)
FABRICS: Apple Red Text on Cream (#5490) "Mama Said Sew" Collection by Sweetwater for Moda
Songbird (C2863) by Carina Gardner for Riley Blake Designs
Hearts on Red (567-R5) Makower
Red Dots on White Fabric (Unidentified)
Scattered Red Stars on White (Unidentified)
Red and White Stripe (unidentified)

Celebrating this finish at Crazy Mom Quilts