Friday 22 February 2013

Nearly Insane Quilt - Block 41, Basket Block

Apple Patchwork Fabric - Nearly Insane Block 41
How cute is this apple fabric?  I recently picked it up as a remainder fat quarter at Country Threads in Bath.  It is not strictly the red and cream scope of my Nearly Insane Quilt, as it has a tiny bit of green and yellow in it, but I thought it would add some 'character'. 
Block 41 is a fairly traditional patchwork Basket Block, so I thought I would pair this up with the Minick and Simpson "Christmas Past" red spotty fabric that I have talked about in the past, to make this block an 'Apple Basket'. I have added a 10 pence coin to give some scale to the finished 6 inch block.
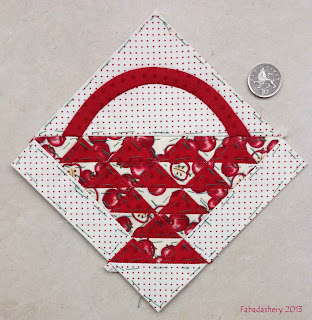
Block 41 - Traditional Basket Block, Nearly Insane Quilt
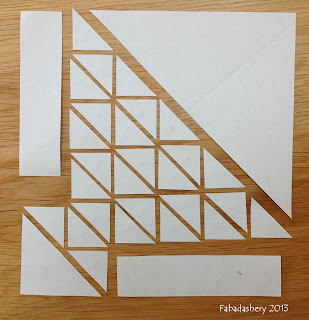
Here are the 31 paper pieces that make up this block, plus the handle of the basket which is an appliqued bias strip.
Block 41 Nearly Insane Quilt - Basket Block
You will see that during the construction of this English Paper Pieced block the incremental growth of the strip due to the fabric being wrapped around the paper, meant that I had to fit a 4 5/16" strip of half square triangles onto a 4" plain strip.
English Paper Piecing, Nearly Insane Quilt Fabadashery
English Paper Piecing
The easiest way I have found to counter this is to level up the ends and start sewing (Stage 1).  By fixing the two pieces together at the beginning, you can then start to manipulate the two pieces, so that they are eventually a perfect match.
English Paper Piecing, Nearly Insane Quilt Fabadashery
Stage 1
Once they are fixed by a few stitches, I then bend the two pieces around my fingers, with the longest edge on the outside.  Like a race track, the outer piece has to travel further than the inner piece, and with a bit of a 'jiggle', you can get them to line up (Stage 2).  For further accuracy, because the fabric is on paper, the paper can be folded in half, and I tend to use the sharp creases as markers to match up as you fit the two edges together.
English Paper Piecing, Nearly Insane Quilt Fabadashery
Stage 2
Always check it as you are going along, unfolding the seam to adjust, giving it a tug here and there to ensure that there will be no overlap at the end (Stage 3).  It is easier to adjust just a few stitches that the full length of the seam.
English Paper Piecing, Nearly Insane Quilt Fabadashery
Stage 3
At the end, the two edges of the pieces should be sewn together with no overlap.  As you can see from the picture below, the end result has a bit of a bend in it.  
English Paper Piecing - Block 41, Nearly Insane Quilt
Never fear.  In this situation I tend to give the joined piece a good steam with the iron.  Also, at the moment the pieces are being held rigid by the paper, once they are finally removed, the shape of the block will be fixed by the sashing, and it will then be able to relax and mould itself into place.  This technique works for me, but probably only because I am confident that the papers will keep the shapes accurate. I know there are some 'corkers' coming up where the half square triangles are half the size of these, and there are many more of them. I think I will just take each block at a time.

English Paper Piecing, Nearly Insane Quilt Fabadashery
Basket Block 41, Nearly Insane Quilt
I built up the block for piecing into smaller blocks, but this was not before I had added the bias strip basket handle, which I appliqued onto the large triangle.  I make my bias binding using a cheap and clever technique I picked up at a Sandie Lush Applique Workshop at Busy Bees Patchwork in Newport.
English Paper Piecing, Nearly Insane Quilt Fabadashery
Folding Bias Binding using a Pin and Ironing Board
I cut my bias strip 1" wide, for a 1/2" wide handle on my basket block handle.  To set the width of the bias strip, I secure a pin to the ironing board, with a 1/2" gap, which I then feed the folded bias strip through, pressing as I go.  By adjusting the pin you can make a bias strip of any width.
English Paper Piecing, Nearly Insane Quilt Fabadashery
Attaching bias strip for handle
I sewed on the bias strip with the paper still inside, and following the line on the paper which was visible through the spotty fabric.  Then, when I sewed the two halves of the block together, I hid the ends of the strip in the seam. 
This seems like quite an epic post for this unassuming block, but once I worked out what I was doing, this block was not too bad.  I know this block also makes up some of the edge blocks, so down the line maybe I will have a 'Cherry basket' too!

With another block finished, this Friday I am joining up with Crazy Mom Quilts.

NUMBER OF PIECES: 31 + 1 (Handle)
DIFFICULTY: 5/10
SMALLEST PIECE: Triangle, 1" (25mm) x 1" (25mm) x 1 7/16"" (36mm)
LARGEST PIECE: Triangle, 5" (127mm) x 5" (127mm) x 7 1/16"(180mm)
TECHNIQUE: English Paper Piecing (EPP)
FABRICS:
"Christmas Past" (14547) by Polly Minick and Lauri Simpson for Moda
Apple Fabric - unidentified
Red Dot on Cream - unidentified

Fabadashery Blog - 3 Month Anniversary Milestones

Have you seen my post "Bonnie Hunter's Easy Street Quilt - Part 8 (nearly)"?  Reviewing my Blogger Stats recently, I noticed that it has had 2000 hits since it was posted in January.  This past week has been the 3 month anniversary since I started this patchwork and quilting blog, and along with the increase in traffic, a lot of things have happened.

The first event marking this weeks 3 Month celebrations was the arrival of a little parcel from the United States.  It was the Giveaway Prize that Suzi the Cat had won on Feline Friday at Sarah Did It!  Isn't she a clever cat - winning fabric for her owner!  This is the first Giveaway Prize we have won on the internet. These two pieces are from the 'Ivory Cats' Collection by Lesley Anne for Quilting Treasures, and look ideal for a future cat mat project. 

'Ivory Cats' by Lesley Anne, for Quilting Treasures, 2011
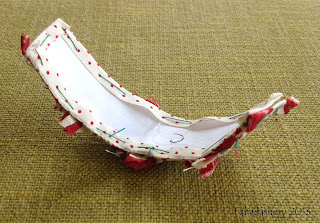
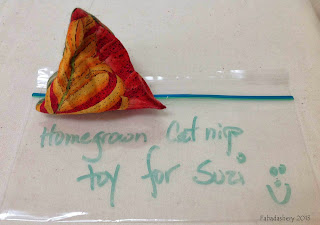
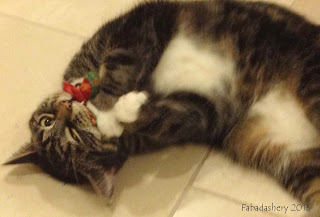
There is was also a bar of chocolate in the packet.  Yum Yum.  I was not the only winner though.  Enclosed in the parcel was a special homemade patchwork Cat Nip toy in a Zip Lock bag.  When I opened it I was over the moon for Suzi, not only was there the toy, but also the bag - she loves to chew on plastic.... 
Cat Nip Toy with yummy Zip Lock Bag
Stage 1
Feline Friday Cat Nip Toy
Stage 2
Feline Friday Cat Nip Toy
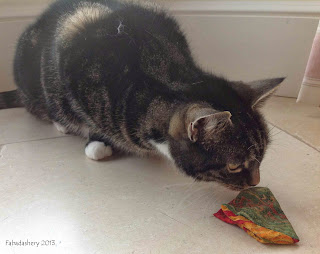
Stage 3 - FRENZY!
Needless to say - Suzi is CRAZY for it, and loves having it rubbed all over her face. She says thanks especially to Pepper, Midge and Squeaky, the Stars of Feline FridayAlso thanks to their Mum, Sarah for prompting me to sort out my 'No Reply Blogger' status - I hope everyone finds it easier now. 
The celebrations continued when I popped over to the Quilt Room blog.  Pam and Nicky Lintott have made their name through designing and publishing books on Jelly Rolls, Charm Packs, Layer Cakes and other pre-cut fabric bundles, and are in the process of pulling a new book together.  A few weeks ago they had a competition to name one of their quilts for their forthcoming book.   The name I submitted was 'Jet Stream Jewel', and the quilt name was chosen for a Runner's Up Prize!   Not only do I have a £10 voucher to spend on fabric, but they also hope to use the name for one of the other quilts featuring in their forthcoming book.  I can't wait to see it.

So a great Anniversry so far. The concept of blogging is not new to me, but it was Bonnie Hunter's Easy Street Mystery Quilt over at Quiltville, which was one of the main motivators for getting me started on publishing a regular sewing blog. That whole experience of piecing a large quilt by machine, sharing the experience with people all over the world, and being part of the 'Mystery Quilt' phenomenom has been an exciting journey, and has allowed me to plug into the sewing world in a whole new way.

Up until now, most of my patchwork and quilting projects have been by hand, and so their progress is slow, which makes newsworthy moments few and far between - not ideal for an active blog. I am sure the hand stitchers and hand quilters out there can empathise with this.  Knowing that I need to put up a post regularly is a real motivator for keeping my sewing projects on track and making me focus on completing projects.  And most of all I enjoy it.

What have been the highlights of your blogging? I would love to hear about your adventures in the blogging world. 

Tuesday 19 February 2013

Nearly Insane Quilt - Block 21

With the quick win of Block 91, I was eager to move on to the next Nearly Insane Quilt block, so made sure a few of my pre-prepared kits were packed in my bag before I left for work this week.  Block 21 was the next choice from my latest Nearly Insane Lucky Draw. During my lunch hours I was able to tack all the fabric around the paper pieces that I had cut out, and piece them together.  No problems with this block, as the construction was very straightforward, with just 25 pieces.  It felt like it came together in no time at all.  These fabrics are from the 'Mama Said Sew' Collection by Sweetwater for Moda.  This is the second block complete, and on my side bar I have added a picture of the whole quilt, so you can see my progress as I go along.
Block 21 Nearly Insane Quilt - English Paper Pieced
When I am at the early stages of a scrappy project, I am always keen to make sure I have a wide selection of fabrics, so you can imagine how excited I was when visiting Freemotion By the River today, to see that Connie is hosting a Giveaway, which is a charm pack, 'Ruby' by Bonnie and Camille for Moda.  This pretty fabric collection has a lovely fresh colour scheme, which includes some RED and WHITE fabrics ... I think I could give a good home to them.  Well, enough of that, or you all might enter.  To quickly change the subject, like all the others, this block does not have an official name, does anyone recognise it? 
Block 21 Nearly Insane Quilt - English Paper Pieced
NUMBER OF PIECES: 25
SMALLEST PIECE: Square, 1/2" (12.5mm) x 1/2" (12.5mm)
LARGEST PIECE: Triangle, 2" (50mm) x 2" (50mm) x 2 13/16" (71mm)
TECHNIQUE: English Paper Piecing (EPP)
FABRICS:
"Red Hoops" (5493-31), "Cream Hoops" (5493-12), "Apple Red on Cream Pinking Shears" (5498-31), "Cream on Apple Red Snaps" (5497-11) all the "Mama Said Sew" Collection by Sweetwater for Moda

Sunday 17 February 2013

Red and White Pinwheel Quilt - Hand Quilting

As I mentioned in a previous post, my hand pieced Nearly Insane Quilt is a portable project for when I am on the move.  If I have some quilting time at home, I am catching up on the backlog of quilts that need hand quilting. 

Suzi the Cat on the Red and White Pinwheel Quilt
This weekend, I have managed to put in quite a few hours of hand quilting to another of my red and white projects - my Red and White Pinwheel Quilt.
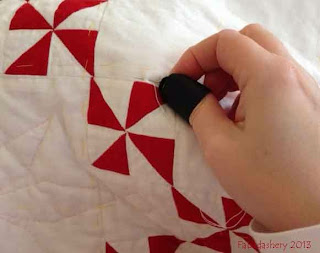
Hand Quilting Red and White Pinwheel Quilt
The top of the Red and White Pinwheel Quilt was English Paper Pieced (EPP), started in early 2009, and the top was completed in March 2011.  A bit of a quilting backlog has built up in the past few years, so I decided to do this one first as it is only a single quilt, and I thought it would get finished more quickly.  At the moment, I am simply outlining the red pinwheels, and I have designed a pattern for the centre of the blocks.  I am sure the remaining quilt pattern will evolve over time. I have managed to put in a good few hours of hand quilting, but it never seems to move on quite as quickly as you hope.
As I have moved my way around the quilt, outlining the red pinwheels, I have come across a few rogue paper templates, even though I thought I had removed the all the papers before I made up the quilt sandwich.  So in addition to quilting, I have had to unpick a few seams to extract the paper and then ladder stitch the seam together again.

English Paper Piecing red and white pinwheel
Rogue paper templates !!!

Is there anyone else out there working on some hand quilting?

Saturday 16 February 2013

Nearly Insane Quilt - Block 91

Nearly Insane Quilt Block 91 Red and White
Nearly Insane Quilt Block 91, English Paper Piecing
With all the preparation to do the Nearly Insane Quilt, the anticipation for starting had built up into quite a big thing. I thought I would break myself in easily with attempting one of the edge half blocks, Block 91. Overall it did not take too much time.  The tacking can be done quite quickly, and this block came together really easily, in total just a couple of hours of hand sewing at most.
Block 91, Nearly Insane Quilt, Paper Templates
As a half block, it only had 18 pieces, and I was only using two different contrasting fabrics.  The little pieces seem very little, with the seams taking up more fabric than the actual piece on some.  It is tempting to have the seams in proportion to the piece, but you do need the full 1/4" to make the seams more secure. I believe there are much smaller pieces to come.
Nearly Insane Quilt Block 91, English Paper Piecing (Reverse)
As I am English Paper Piecing it, I have not removed the papers yet, and knowing me, I won't do that until the entire quilt (or at least the centre) is put together, so bear with the green tacking thread, I know it is going to become a close friend in the foreseeable future.

NUMBER OF PIECES: 18
DIFFICULTY: 1/10
SMALLEST PIECE: Triangle, 5/8" (16mm) x 5/8" (16mm) x 7/8" (22mm)
LARGEST PIECE: Rectangle, 2.5" (63mm) x 1.25" (31mm)
TECHNIQUE: English Paper Piecing (EPP)
FABRICS:
"Polka Party Petite" (Buttercream) "Lakehouse Dayz" Collection by Holly Holderman, Lakehouse Drygoods (LH05037)
"Lazy Daisy Red" by "Mama Said Sew" Collection by Sweetwater for Moda (M 5494 21)

Friday 15 February 2013

Broken Dishes Quilt - Cat Mat

Finding useful opportunities for expressing your quilting creativity is sometimes a challenge.  I love making full size quilts, but the backlog of quilt tops that need quilting in my cupboard is a reminder that large projects are not always the most appropriate project to launch into.  A Mug Rug is fun, but to the other extreme, as they can be small and fiddly.  The alternative - the Cat Mat.

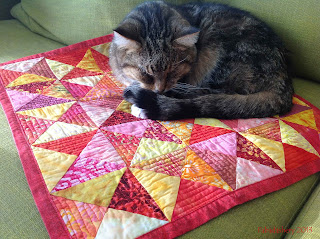
Sparky the Cat on Broken Dishes Pattern Cat Mat Batiks
Sparky the Cat on Broken Dishes Cat Mat
This is Sparky the cat modelling my most recent Cat Mat using the Broken Dishes quilt block pattern.  I enjoy making this size project as I find that the size of a Cat Mat offers more scope to test out new quilting patterns, and to practice some different machine quilting techniques.  Best of all they actually get used, all day, every day, by the cats, as they are placed in strategic places around the house.  Also, they can be thrown into the washer easily.
This particular project used 5" batik charm squares in a mix of yellow, orange, red, pink and purple. The mat finishes up 18" square, with the finished quarter square triangles being 3.5". To create the contrast that builds up the Broken Dishes pattern, I made up some quarter square triangles, pairing up light and dark squares, front sides together.  I then marked a diagonal cross on the lighter fabric, as a guide for sewing.  The dashed lines on the diagram show where I machine stitched the two squares together with a 1/4 " seam allowance, the solid line shows where I cut them, once stitched on the machine.
Quarter Square Triangle Unit Pattern
Quarter Square Triangle Unit
Once sewn and cut, you have sets of light / dark triangles, which then need to be paired up into the squares, which can be seen on the far right of this picture.

Quarter Square Triangles  batik fabric
Quarter Square Triangles - half way through!
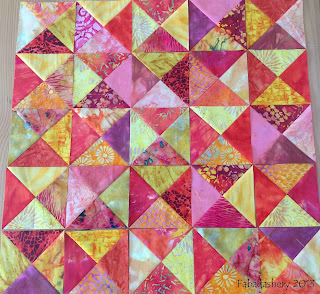
With the squares complete, plan the layout, making sure the lights and darks are next to each other throughout.  I find that taking a picture on my iPhone or iPad at this stage is a useful reminder of the layout, as once I start lifting up the pieces for sewing on the machine the blocks easily get mixed up!

Broken Dishes Quilt Pattern Layout Batik Fabrics
Broken Dishes Quilt Pattern Layout 
For this mat, I backed it with a red fabric, which I cut larger than the final size, so that the backing fabric could be brought forward onto the front for the binding, which I machined in place, after I had quilted the mat. As I said before, these mats are ideal for improving your free machine quilting techniques, and on this one I filled the darker triangles up with a smooth zig-zag pattern, which followed the graduating shape of the triangle.  

Broken Dishes Quilt - Backing and Binding Batik
Broken Dishes Quilt - Backing and Binding
I love the Broken Dishes pattern.  I think it is especially great for using up scrap fabrics, the pattern is quite dynamic, and I particularly like quilts which have the same repetitive pattern throughout.  I don't profess to be ther greatest machine quilter, and I have had no complaints about the quilting so far, but then Sparky's eyesight is not too great ...
 

Nearly Insane Quilt - First Draw

The first blocks for the Nearly Insane Quilt have been drawn.  They are blocks
21 - 41 - 55 - 91
I have now printed off the blocks from the Electric Quilt 5 software and made up little portable packs with the cut up paper pieces, the fabric, and the instructions, for these particular blocks.  The drive behind this patchwork project is for when I am travelling, or I am out and about, and I need a small portable sewing project with me.  When I am at home I am MEANT to be catching up on my hand quilting backlog...
Nearly Insane Block Home Made Portable Project Packs
As I mentioned before, the fabric for the sashing and cornerstones have not been finalised, but I am realising that I should be doing these as part of my batch system, so that when the time comes to put the quilt together everything is ready to go.  Actually, I should also be doing some of the zig zag border too .... but I haven't chosen the fabric for that yet either.
What I have noticed is, that besides their number, these Nearly Insane blocks don't have names, so if you recognise any as we are going along, then please shout out any suggestions.

Monday 11 February 2013

Nearly Insane Quilt - Passport Packed!

Before you embark on a journey you need to make your travel arrangements, pack your suitcase with essentials, and arrange for someone to feed the cats.  These are the sort of preparations I have been making before my Nearly Insane Quilt journey.

1.  My guidebook on my Nearly Insane Quilt journey is Liz Lois book which has the templates for each of the 6" blocks, colour pictures of some completed Nearly Insane quilts, and along with some beautiful quilts on the internet, has been the inspiration for the journey in the first place.
Book: Nearly Insane Quilt by Liz Lois
2.  The type of journey I will be going on will be a hand pieced one.  It will largely be English Paper Pieced (EPP), but if there is heavy weather ahead, I am prepared for an alternative route using Foundation piecing.
3.  The flavours I will be tasting will largely be red and cream, with some white fabric.  At the moment I have not made a final decision on the fabric for the sashing and the cornerstones.  At the moment the sashing is probably a cream calico and the cornerstones a solid red.  But like any good quilter, I will try to fit in a few 'fabric shop hops' along the way of my journey, where I hope to find something more appealing.

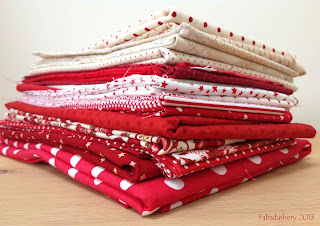
Red and Cream / White Fabrics for Nearly Insane Quilt
3.  My map on the journey is Electric Quilt 5.  I have already drawn out each block into the software, and set them into the quilt.  I have also scanned all my fabrics in, as a 'Nearly Insane Collection'.  This allows me to print off an accurate block for my paper pieces, and the shapes for cutting out the fabric.  It will also allow me to keep track of my progress, so I know how much of the quilt I have done, and how far I have to go.
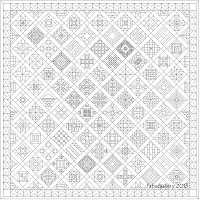
Nearly Insane Quilt in Electric Quilt Software Fabadashery
Nearly Insane Quilt in Electric Quilt Software

4. To help decide which route I am taking I have set myself up a lucky draw.  I have cut up each block from the Electric Quilt print out of the whole Nearly Insane Quilt, numbered each block, and put them in a lucky dip bowl. For each draw I will randomly select 3 blocks, and 1 edge half block.  This will allow me to prepare the fabrics as I go along in a manageable way, and set them up in portable project bags, so there is always something ready to do on the go.

Nearly Insane Quilt - Lucky Dip Bowl Fabadashery
Nearly Insane Quilt - Lucky Dip Bowl
I think that is about everything for now.  I will be on this journey for quite a while, but I hope to send you all regular postcards!

Saturday 9 February 2013

Red and Cream Fabric Choice - Nearly Insane Quilt

Now that I have decided to embark on the 'Nearly Insane' quilt, I have spent a lot of time preparing for it.  I will be hand piecing it, probably using the English Paper Piecing method, but I can also see a need to some foundation piecing work for the more intricate blocks.  I have put all the blocks into Electric Quilt 5, and I have also now scanned all my red, white and cream fabrics into the package.  Despite having the Electric Quilt software for years, this is the first time I have done this, and it went relatively well.

Mama Said Sew by Sweetwater for Moda Red and Cream
'Mama Said Sew' by Sweetwater for Moda
The foundations of my colour choice are based on the red and cream colourway in the 'Mama Said Sew' fabric range by Sweetwater for Moda.  As soon as I saw this range, I knew I wanted a piece of it.  Not only is it in a red and cream colourway, but it has an appropriate set of sewing themed fabrics.  I particularly like the little red pinwheels.

Red and White Fabric Charm Squares
I have also gone through all my charm packs, charm squares, and fabric scraps searching for red and cream fabric.  This has included some of the reds from a Bonnie and Camille, 'Bliss' Moda Candy Bar, and some Civil War pre-cut circles I bought at Keepsake Quilting in Meredith, USA, several years ago.  As you can see, nothing is safe - even the tiny little charm squares are in for a shout, especially as a lot of the blocks have very tiny pieces in them.
Red and Cream  White Fabric Stash Fabadashery
Red and Cream / White Fabric Stash

Then finally, the red, cream and white fabrics from my stash.  Lots of red and white spots and dots.  With the project probably taking a few years, no doubt my antennae will be up for red and cream fabrics that are within arms length.

Friday 8 February 2013

Getting to Grips with Nearly Insane Using Electric Quilt 5

Using Electric Quilt 5 for my Nearly Insane Quilt
In the dark evenings this week I have been quietly creating the blocks for the Nearly Insane quilt on the Electric Quilt 5 software.  In Liz Lois 'Nearly Insane' pattern book of the Salinda Rupp quilt they are drawn out to size for tracing, and I am hoping that all this effort on the Electric Quilt software up front will make it easier for me to keep track of what I am doing in the long run. It has been a good exercise in becoming familiar with different patterns on the 6" blocks, as well as my Electric Quilt software.  It has also helped for generally just getting my head around how I am going to approach the project. 
Some were a doddle to work out on the software, but others (Blocks 49, 75), were a test of my maths skills - and I haven't even sewn them yet!  I also think I have been lulled into a false sense of security by the fact that I have been working on them on the computer screen where they are twice the size of the actual block.  There are going to be some very tiny pieces in this quilt.
I will admit at this stage that I have adapted some of the blocks to fit in with my personal preference for order and symmetry.  There are plenty of pretty blocks, but the centre of Block 58 looked a bit of a dogs dinner, so I have re-orientated the little half square triangles.  You get the impression that the original quilt was a REAL scrap quilt, and some of the block patterns have been necessarily adapted by Salinda Rupp to accommodate her scrap stash.
I am now getting the strength up to scan my own red and white / cream fabrics I will be using.  I have never got as far as this with a quilt design on the Electric Quilt software, so wish me luck.

Sunday 3 February 2013

Mini Hexagon Mug Rug

A Morris Tapestry Moda Fabric Hexagon Mug Rug
A Morris Tapestry, Hexagon Mug Rug
As you would have read in my last post, I have been aching to do some sewing this week, and finally I have managed it. Firstly, thanks to Sarah at Sarah Did It for the gentle nudge and inspiration for this Mini Hexi Project, which has kept me quiet for the past 24 hours. I wanted a little hand piecing project, using the English Paper Piecing method, AND I needed to produce a little birthday gift for this Monday, so this little hexagon Mug Rug fits the bill nicely.
English Paper Piecing Templates using Powerpoint
English Paper Piecing Templates in MS Powerpoint

The other night, whilst doing some work on the computer, I quickly popped into MS Powerpoint and drew up some paper templates. I found that the actual 'hexagon' shape in the package did not have equal length sides, so instead combined six equilateral triangles and some lines to make up the hexagons. The sides are 3cm each.

English Paper Piecing Hexagon Templates
I was travelling yesterday and NOT driving, so I seized the moment to start the project. This meant a rather hurried choice of fabric, so I played safe and went for a fabric range I had in my stash.  I was literally cutting out the fabric with my coat on, and the engine running on the car! 
A Morris Tapestry Fabric, MODA, 8172 8177 8176 8171
A Morris Tapestry Fabric, MODA,
(L-R) 8172-15, 8177-17, 8176-15, 8171-34) 
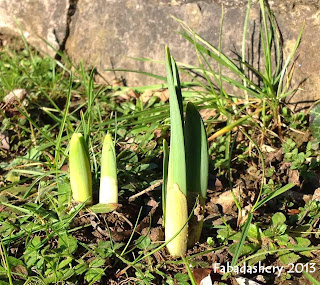
The fabric I chose was from 'A Morris Tapestry' by Barbara Brackman for Moda. They are reproductions of some William Morris (Arts and Crafts Movement) prints from about the 1890's, featuring the Strawberry Thief and a pretty Daffodil print. I thought this was appropriate because, it was a lovely sunny day here today and a chance to see the progress of the Spring DaffodiI bulbs - little way to go yet!  
Daffodil Bulbs February 2013
Daffodil Bulbs - February 2013
During the hour I had in the car, I was surprised to see that I had covered all my paper templates and that they were ready for stitching together.  I tend to use cheap tacking thread in a contrasting colour and stitch right through the paper.  It is the way I have always done it.  I like this method, as you never know how long it will be before you actually are going to stitch it together when you are hand piecing, so they can sit there for years without a worry.

But this project had to be done today. After a little thought, I decided that the easiest way to construct the little Mug Rug was to do it in columns, this avoided any awkward seams, and you can see here the different stages.
With only tiny pieces, it did not take long to piece together, and in no time at all it was time to take the paper out.  This is a picture of the reverse of the mug rug, after it was stitched together, but with the paper still in place.  I tend to give  projects like this a good press whilst the papers are still in place - I find it helps to keep their structure.

Hexagon English Paper Piecing - Reverse
With the papers removed, I pressed out the seam, and made up a quilt sandwich from some scrap wadding, and some fabric for the reverse.  I just did some simple hand quilting, outlining the shapes. If I am hand piecing and hand quilting an item, I usually like to keep the integrity of the piece by banning ALL machine stitching, but lately, once the top is quilted, I have started to machine stitch the edge, to stay stitch the quilt sandwich, which will then be hidden in the binding. I used a straight edge binding.  Again, for this little project I did use the machine to sew on the binding, and then hand stitched it on the reverse. 

Hexi-Puzzle Mug Rug - English Paper Piecing
The good news is that the gift is completed in time, and that I still have the rest of the day to do some stiching!  If you enjoy hand piecing, especially Hexagons, Sarah Did It has a special Hexi Link Up on the 17th of each month - do be sure to join in!
Today I am linking up with Connie at Freemotion By The River and Crazy Mom Quilts.


Saturday 2 February 2013

Virtual Sewing Progress

This week I have spent more time thinking about sewing than actual doing any.  I have been working all day, as well as evenings this week, and sewing just has not had a look in. My journeys to work in the car have been spent dreaming of projects I want to do, of fabric I would need to buy for them, and lamenting the lack of time I have had in my sewing room.  Since Suzi became an 'internet sensation' by winning the Feline Friday giveaway at the Sarah Did It Blog, she has behaved like a winner of X Factor, but even she is missing the special time we share in the sewing room.

When life gets too hectic for sewing, there are places on the internet that I always seem to head off to for an instant fix.  The Fat Quarter Shop, to review their What's New section, to Green Fairy Quilts, to marvel at the incredible long arm quilting skills of Judi Madsen, and the list of bloggers that I follow.  Are there places that you head to for some virtual sewing?
 
Thank heavens for Blogland.
 

1. I have been posting my blog for just a little over two months, and this week I reached 21 Followers.  This means that Damsel Creations, the kind-hearted blogger who was the first Fabadashery Follower, has been moved to a second page. Just to say thank you for leading the way - you are not forgotten!

2. This week a blogger, Zipje and Zopje from the Netherlands, got in touch to regarding my Butterfly Quilt, as her sewing bee group are just about to start the same quilt.  Do visit to watch their progress.  It is a great quilt to make.

3. Sarah at Sarah Did It has been posting the progress of a lovely hand pieced Hexagon project, and kindly suggested a 'Mini Hexi Puzzle' for those of us who were jealous in need of a quick fix of hexies. By Thursday night I had cut out the papers ... 

4. Finally, too much time spent on the Internet has introduced me to projects that I never knew I needed to do, and they are posted here on my Pinterest page.  The one that has been dominating my mind is the 'Nearly Insane', Salinda Rupp quilt, published in a book by Liz Lois.  I am pretty much sure that this is the next major hand piecing project I am doing, confirmed that I ordered the book from the USA over a week ago - it arrived this morning.