Showing posts with label Quilting. Show all posts

Thursday, 10 April 2014

Spring Quilt Festival 2014 - Exeter Westpoint

'Brick Lane' Medallion Quilt by Village Fabrics
At the weekend I made a trip to Exeter to visit the Spring Quilt Festival at the Westpoint Showground.  It's a small show, but when you need a quick quilt fix it is the ideal tonic.
'Delft Floor Tiles' by Alice Webb Quilt
'Delft Floor Tiles' by Alice Webb

This blue quilt was a small hanging by Alice Webb.  It caught my eye as it reminded me of my on-point Nearly Insane quilt, and little projects that could emanate from it in the future.  I often have a small 3" block in my hand as I construct the full block and think how cute it is.

'Enchanted Garden' Quilt by Rhianon Taylor
Every time I go to a quilt show, I am usually at a certain stage in my quilting thoughts, and different things appeal to me amongst the exhibits. This time around it was quilting.  In terms of quilting on quilts, there was a lovely display of quilts by Rhianon Taylor, also blogging as the Nifty Stitcher

Detail - 'Enchanted Garden' Quilt by Rhianon Taylor
Just look at this amazing machine quilting. A full display of her work can bee seen on her blog, and no doubt it will be touring in future Grosvenor Exhibitions coming up throughout the year if you want to see it in the flesh.
'Baby Jane' Quilt by Sheila Lloyd
After my trip to Nantes last year to see the 150th Anniversary display of Dear Jane quilts, it was lovely to see another.  Sheila has pretty much stuck to the style and fabrics of the original Dear Jane quilt by Jane Stickle - it looked lovely.

Naturally I made a few purchases at the stalls.  I added a few fat quarters to my stash of neutrals from a charity stall, and bought the 'Little Black Dress 2' layer cake by BasicGrey.  The Japanese fabric was from a rummage bin - it has a striped design which I though had lot of potential ...
www.giddysprite.com Cat coaster
Cat Coaster - Giddy Sprite Designs
Also, whilst I was out and about at the weekend I also picked up this little cat coaster by Giddy Sprite.  Suzi the cat seems to have this expression on her face permanently at the moment - the birds outside are driving her to distraction!


Monday, 17 June 2013

Hand Quilting Progress - Red and White Pinwheel Quilt

Marking cross-hatching for hand quilting
on Red and White Pinwheel Quilt
My Nearly Insane quilt activity seems to have been put on the back burner for the time being.  Instead, I am currently trying to catch up with my hand quilting back log, which as you can see is STILL the Red and White Pinwheel Quilt.  As you can also see, I am still using the Wipe Off Fabric Marker, which I am finding works well.  What I have found is that you need to remove it with a wet cloth rather than a damp cloth - it is the water that removes the blue mark. So far, so good.
To get this one moving, I needed a deadline, so I have entered the quilt in a show, and now I am frantically quilting to get it done.  Mind you, the pace I am going could not be mistaken for 'frantic', as there is a lot of stitching for what seems like meagre progress.  The overall plan is not fully worked out, and the more I do, the more I feel I need to do, as well as the binding, plus the hanging tab, and the quilt label.  I can see myself stitching, just minutes before I hand it over!
Book: "Quilt It!" by Barbara Chainey

I would not say I am an expert at hand quilting, and don't feel that I have quite mastered how to choose a quilt patterns for particular quilts, but one book I find really useful is Barbara Chainey's 'Quilt It', as it gives loads of suggestions, especially for pieced work, rather than patterns for whole cloths.  I have designed some motifs of my own for this quilt, plus a lot of outline quilting, and at the moment I am working on some cross-hatching. 
It will get done.

Joining Up with Design Wall Monday! and Slow Stitching Sunday.
 

Sunday, 21 April 2013

Hand Quilting - Wipe Off Fabric Marker

I have been enjoying doing my Nearly Insane Quilt blocks far too much lately, and felt that I needed to spend some time on hand quilting my red and white pinwheel quilt.  I have got a self-imposed deadline for completing it, which is approaching fast.
Having completed the outlining, I am now quilting the motif in the centre of each square.  I designed the motif myself and made a template out of some heavy plastic to draw around, several months ago. For the first one I had used a watercolour pencil, but having watched a video tutorial by Judi Madsen at Green Fairy Quilts, I thought I would try a Sew Easy Wipe Off Fine Line Fabric Marker to mark the quilting pattern.

Sew Easy Wipe Off Fabric Marker Pen
The idea of drawing in pen on my nice, white quilt, filled me with apprehension, so I have documented it, mainly to remind myself how it went for my own future reference.  Drawing the pattern on was easy enough, as the tip of the pen is really fine - good accuracy. I can never guarantee how long a hand quilting project will take, it maybe years, so I am only doing one motif at a time, as I am not sure how long the pen will last.
Motif marked onto quilt with Fabric Marker Pen
Once I had hand quilted the motif, I dampened a microfibre cloth, and wiped the marks away.  As you can see below, yes, it really did wipe the blue pen marks away! Just like magic!

Wiping off Fabric Marker Pen, with a microfibre cloth
However, when I looked again the following day, I noticed that there were some blue stains lingering, mainly at the points where I stopped the pen when drawing around the quilt template. 
Remaining blue stains, after 12 hours
I have given it another rub, and it seems to have got rid of the lingering blue stains, and I will check it again before I give it its final wash.  I don't want to rub the quilt too much though.  I guess until I finish the quilt, and  give it a good wash, I am not going to know for sure whether it has worked or not.

Here are the instructions for reference.

Instructions:
All Fabric Markers should be pre-tested on a scrap of your fabric first, for both application and removal.
All temporary markings must be removed before ironing or washing in detergent. Avoid direct sunlight or heat.
To remove marks, simply wipe off with a damp cloth, or rinse out in cold water.

Friday, 5 April 2013

String Quilt Cat Mat - Easy Street Parking Lot!

Way back in January, I mentioned that I had plans to do a project with the scraps from my Easy Street Quilt, the online 2012 Mystery Quilt over at Quiltville.  However,  I woke up planning to do a machining project, and instead ended up with ALL my patchwork and quilting fabric out of my cupboard.  I had decided to reorganised my fabric stash. Several months down the line, I have revisited my original plans, and this week have produced a lovely new Cat Mat, which I am calling “The Easy Street - the Parking Lot”. 

String Quilt, Easy Street - The Parking Lot
In Bonnie K Hunter's book 'String Fling', she introduces her scrap user system, and a technique of using pages from an old telephone book as the foundation for stitching small scrap fabrics.  This was the technique I wanted to try out, but as my paper alternative, I had put aside the Christmas edition of the Radio Times, which by removing the centre staples has given me a double width of paper to stitch.  It has also highlighted to me how much of the Christmas period I spent on the Easy Street Quilt – I don’t  think I watched any TV!
2012 Christmas Edition Radio Times Cover Snowman Raymond Briggs
2012 Christmas Edition Radio Times - String Foundation Piecing
I did do a rough design in my Electric Quilt software, but I haven’t followed it slavishly, and instead have used my usual technique of muddling through trying to get everything the right size.  My colour scheme for Easy Street Quilt was Purple, Red and Green, with a Tan background, and most of my leftover scraps are pretty small, so my paper strips are only 3” wide. 
Easy Street Quilt Scraps Red Purple Green Fabadashery
Easy Street Quilt Scraps
Sewing the strips was easy on the machine, and I managed to get a production line going. I found it was better to remove the paper before tidying up the edges, as once cut, the stitching seam was not as strong to resist the ripping of the paper. 
String Foundation Piecing Pfaff 2058
String Foundation Piecing
As regular Followers will know, most of my work lately has focussed on hand stitching my Nearly Insane Quilt, so it seems like an age since I sat down at the machine (Note To Self: I really do need to set up a Leaders and Enders project, especially if Bonnie rolls out another Mystery Quilt at the end of the year!)  For the quarter square triangles, I tried to use the clever technique I used on my Broken Dishes Cat Mat, but my scrap pieces were too small and I had to cobble most of them together in a more ‘traditional’ method. 
Eventually, the quilt top came together, and was ready for quilting. 
I had some scrap polyester wadding to use, and I still had plenty of the Kansas Troubles 'Bound to the Prairie' fabric which I used for the backing on my Irish Chain Quilt, which I have used for the backing. Up close it is a lovely little print, but from a distance it looks like a murky porridge – however, murky porridge is good for hiding any less refined stitching when machine quilting…
Quilt Sandwich being Machine Quilted Pfaff 2058
Quilt Sandwich being Machine Quilted
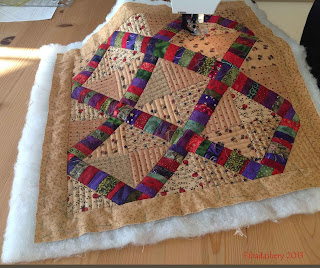
My actual Easy Street Quilt has yet to be quilted, and part of this project was to gain some strength experience of machine quilting to tackle this large project.  I was recently inspired by a little quilting video tutorial on the Green Fairy Quilts blog, by Judi Madsen, which although aimed at long arm quilting, highlighted to me the importance of marking your quilt, and planning the design head.  Also, I decided to abandon the worry of getting the tension right for free machine quilting, and stuck with using my straight stitch with the feed dogs up.   I went for a simple channels of stitching in the squares, rotating it by 90 degrees on each quarter. 
Quilt Detail Fabadashery
Quilt Detail
I think for this little quilt, the quilting has worked well, and enhances the pattern nicely – just as it should be.   This cat mat is only about 20 inches square, but manoeuvring it on my domestic machine was not as easy as you would want it to be, which makes me think – how realistic is it going to be to get the full size Easy Street Quilt under it?  I think I need to sit down and work out a design, and be realistic about how long it is going to take.  One assumes that using a machine means it will be quick, but I think on this occasion, I need to put that assumption to one side.
To finish it off, I pieced together some binding from the scraps, machine stitching it on the back, and hand sewing it on the front. 
Cat Kitty sitting on quilt
Suzi the Cat on the new Cat Mat
I am really pleased with how it has turned out, but think I have enough projects in this colour combination for now.  It did reduce the scraps, but there are still plenty more.

The good news is, the Quality Control Department has already signed it off.

Featuring Feline Friday and Crazy Mom Quilts!

Thursday, 21 March 2013

Red and White Pinwheel Quilt - March Update

Hand Quilting the Red and White Pinwheel Quilt
Over the weekend I did lots of hand quilting on my Red and White Pinwheel Quilt.  At the moment, I am just stitiching around the pinwheels, but I did manage to complete that stage, at least.  It is slow because I am having to stitch along the edge of the seams, but I do love the way that hand stitching slowly calms down a quilt top.  I have a motif prepared waiting for the centres, but no plans for the borders or the edges.  I tend to let it evolve as I go along, ( ... in answer to Leanne's contemplation about Quilting Decisions, at Quilt Wangarei from New Zealand).

TOP TIP: You will see a scrap from 'A Morris Tapestry' by Barbara Brackman which I used in the Mini Hexi Mug Rug that I made, which I am using as a contrasting marker, to spot where I have I have left my needle. Finding the white thread on the white background can be challenging!

Saturday, 16 March 2013

Happy International Quilt Day!

24 hours ago I didn't even know that there was an International Quilt Day, but thanks to the internet and all the quilting bloggers, word got out, even to the UK.
I have the weekend to myself this weekend, and planned to put some time into quilting my red and white pinwheel quilt (however much I would love to be making more Nearly Insane blocks!).  I thought I would plant myself in front of the television and sew - but what to watch?
Thanks to the shout out by Missy Shay, I learnt that The Quilt Show, hosted on the internet by Alex Anderson and Ricky Timms are broadcasting their shows for FREE over the International Quilt weekend celebrations.  After registering and entering my new log in, I have even managed to project the shows from my iPad on to the main television using our Apple TV - I am cookin' with gas!

So far I have seen Weeks Ringle and Bill Kerr, Sue Garman, and Gina Perkes, as well as making some stitching progress on the red and white pinwheel quilt.  Besides a break to watch the first race in the Formula 1 Motor Racing from Australia, I will be watching the back catalogue of the Quilt Show and stitching.
Happy International Quilt Day!
 

Friday, 8 March 2013

Single Irish Chain Charm Quilt

As I am at the beginning of my Nearly Insane Quilt journey, I thought I would share another of my completed hand pieced, hand quilted marathons with you.  This is my Irish Chain Charm Quilt. It is hand pieced, using the English Paper Piecing method, and hand quilted.


Single Irish Chain Charm Patchwork Quilt
Single Irish Chain Quilt
The start of my patchwork and quilting journey started when I inherited a fabric stash from a friend.  Don't get me wrong, there was plenty of fabric and thread in my life, just not the 100% cottons used for patchwork and quilting.  Some of the little gems in the collection were bags of  small charm squares, which were less than 2" square. 
Fabric Charm Squares, 1" - 2" square
I believe they were from the era before the internet and online fabric databases, when mail order shops would send out small samples for customers to select their quilt colours from.  These little pieces intrigued me, and quietly laid down the gauntlet 'find a project to use us in'An Irish Chain quilt was the solution.  Also, we were expecting the arrival of a camper van, so I decided to make a quilt for use in the van.


Single Irish Chain Quilt Fabadashery
Single Irish Chain Patchwork Quilt
Obviously the size of the charm squares put a limit on the size of my shapes, so each small square was 1" big.  I made up the English paper piecing templates using the Table function in MS Word, where I could set the size of the cells to be 1" x 1", print them off and cut them out.  From the charm packs I selected the deep and warm toned charm squares, which have a jewel like effect, and sought out a light background fabric that would add a subtle texture.  I had already started to cover these little squares with the charm fabrics on the train to work, before I found a suitable background fabric.  In the end I chose a little tan, tone on tone sprig print, "Bound to the Prairie" #9195 by Kansas Troubles for Moda (some of you may be familiar with it - it was the neutral in my 2012 Easy Street Mystery Quilt).  It also matched the woodwork in the camper van perfectly.
Single Irish Chain Quilt - Ideal for a Camper Van!
I remember pouring the squares out onto the shop counter to match up this co-ordinating fabric as the assistant looked at me in disbelief, commenting ,"You do know there is an easier way of doing this, don't you?" Yes, there might have been, but at the time carrying a sewing machine on the train each day was not an option! This portable hand piecing project went with me everywhere, and often or not, a stray square would turn up in the boot of the car, down the side of the sofa - I often wonder how many got left on the train...

Irish Chain Patchwork Quilt
The Single Irish Chain pattern is made up from a 9-patch, alternating the background fabric and the main fabric.  In this case, the 1" squares made up a 9-patch 3" x 3", and that was the same size as the alternating 3" x 3" background fabric square.
Detail of hand pieced 9 patch block Irish Chain Quilt
Detail of hand pieced 9 patch block, Irish Chain Quilt
The quilt is hand quilted, firstly by quilting around the coloured squares, and then by adding a further cross-hatch pattern in the centre.  The border is also cross-hatched.  On this particular quilt, I think this simple quilting pattern works well with the Irish Chain quilt.

Scrappy Border - SingleIrish Chain Quilt Fabadashery
Scrappy Border - Irish Chain Quilt
To add to the scrappy nature of the quilt I decided to make up the binding from further scraps, which are also 3" long.  The background fabric was also part of the Kansas Trouble, 'Back to the Prairie' range.  Up close it is a very pretty print, and although it disguises the quilting stitches on the back nicely, from a distance the colours tend to blend into a muddy colour.  I used a small piece to make a quilt label using my Husqvarna Designer 1 Embroidery Machine, using Isacord embroidery thread.  I didn't use a strong contrasting thread, as I prefer a more subtle label, but it does the trick.

Quilt Label - Single Irish Chain Quilt
This quilt tends to live in the camper van, getting used regularly if we head off on a trip during the winter months.  I love spotting all the different fabrics as I am cosied up in bed!

There are still plenty of these charm squares in my fabric collection, any ideas for the next project?

Joining up with Crazy Mom Quilts.

Statistics
Dimensions: 150cm x 178cm (approx 5ft x 6ft)
Blocks: 3” x 3”
Piecing Method: English Paper Piecing. Hand Pieced
Quilting Method: Hand Quilted
Dates: Autumn 2006(?) – March 2009


Competition Entries:
2009 Traditional Quilts, Quilts UK , Malvern

Sunday, 17 February 2013

Red and White Pinwheel Quilt - Hand Quilting

As I mentioned in a previous post, my hand pieced Nearly Insane Quilt is a portable project for when I am on the move.  If I have some quilting time at home, I am catching up on the backlog of quilts that need hand quilting. 

Suzi the Cat on the Red and White Pinwheel Quilt
This weekend, I have managed to put in quite a few hours of hand quilting to another of my red and white projects - my Red and White Pinwheel Quilt.
Hand Quilting Red and White Pinwheel Quilt
The top of the Red and White Pinwheel Quilt was English Paper Pieced (EPP), started in early 2009, and the top was completed in March 2011.  A bit of a quilting backlog has built up in the past few years, so I decided to do this one first as it is only a single quilt, and I thought it would get finished more quickly.  At the moment, I am simply outlining the red pinwheels, and I have designed a pattern for the centre of the blocks.  I am sure the remaining quilt pattern will evolve over time. I have managed to put in a good few hours of hand quilting, but it never seems to move on quite as quickly as you hope.
As I have moved my way around the quilt, outlining the red pinwheels, I have come across a few rogue paper templates, even though I thought I had removed the all the papers before I made up the quilt sandwich.  So in addition to quilting, I have had to unpick a few seams to extract the paper and then ladder stitch the seam together again.

English Paper Piecing red and white pinwheel
Rogue paper templates !!!

Is there anyone else out there working on some hand quilting?

Sunday, 3 February 2013

Mini Hexagon Mug Rug

A Morris Tapestry Moda Fabric Hexagon Mug Rug
A Morris Tapestry, Hexagon Mug Rug
As you would have read in my last post, I have been aching to do some sewing this week, and finally I have managed it. Firstly, thanks to Sarah at Sarah Did It for the gentle nudge and inspiration for this Mini Hexi Project, which has kept me quiet for the past 24 hours. I wanted a little hand piecing project, using the English Paper Piecing method, AND I needed to produce a little birthday gift for this Monday, so this little hexagon Mug Rug fits the bill nicely.
English Paper Piecing Templates using Powerpoint
English Paper Piecing Templates in MS Powerpoint

The other night, whilst doing some work on the computer, I quickly popped into MS Powerpoint and drew up some paper templates. I found that the actual 'hexagon' shape in the package did not have equal length sides, so instead combined six equilateral triangles and some lines to make up the hexagons. The sides are 3cm each.

English Paper Piecing Hexagon Templates
I was travelling yesterday and NOT driving, so I seized the moment to start the project. This meant a rather hurried choice of fabric, so I played safe and went for a fabric range I had in my stash.  I was literally cutting out the fabric with my coat on, and the engine running on the car! 
A Morris Tapestry Fabric, MODA, 8172 8177 8176 8171
A Morris Tapestry Fabric, MODA,
(L-R) 8172-15, 8177-17, 8176-15, 8171-34) 
The fabric I chose was from 'A Morris Tapestry' by Barbara Brackman for Moda. They are reproductions of some William Morris (Arts and Crafts Movement) prints from about the 1890's, featuring the Strawberry Thief and a pretty Daffodil print. I thought this was appropriate because, it was a lovely sunny day here today and a chance to see the progress of the Spring DaffodiI bulbs - little way to go yet!  
Daffodil Bulbs February 2013
Daffodil Bulbs - February 2013
During the hour I had in the car, I was surprised to see that I had covered all my paper templates and that they were ready for stitching together.  I tend to use cheap tacking thread in a contrasting colour and stitch right through the paper.  It is the way I have always done it.  I like this method, as you never know how long it will be before you actually are going to stitch it together when you are hand piecing, so they can sit there for years without a worry.

But this project had to be done today. After a little thought, I decided that the easiest way to construct the little Mug Rug was to do it in columns, this avoided any awkward seams, and you can see here the different stages.
With only tiny pieces, it did not take long to piece together, and in no time at all it was time to take the paper out.  This is a picture of the reverse of the mug rug, after it was stitched together, but with the paper still in place.  I tend to give  projects like this a good press whilst the papers are still in place - I find it helps to keep their structure.

Hexagon English Paper Piecing - Reverse
With the papers removed, I pressed out the seam, and made up a quilt sandwich from some scrap wadding, and some fabric for the reverse.  I just did some simple hand quilting, outlining the shapes. If I am hand piecing and hand quilting an item, I usually like to keep the integrity of the piece by banning ALL machine stitching, but lately, once the top is quilted, I have started to machine stitch the edge, to stay stitch the quilt sandwich, which will then be hidden in the binding. I used a straight edge binding.  Again, for this little project I did use the machine to sew on the binding, and then hand stitched it on the reverse. 

Hexi-Puzzle Mug Rug - English Paper Piecing
The good news is that the gift is completed in time, and that I still have the rest of the day to do some stiching!  If you enjoy hand piecing, especially Hexagons, Sarah Did It has a special Hexi Link Up on the 17th of each month - do be sure to join in!
Today I am linking up with Connie at Freemotion By The River and Crazy Mom Quilts.


Saturday, 17 November 2012

#2 Butterfly Quilt - Techniques and Construction


Butterfly Quilt English Piecing Blocks
English Paper Piecing the Butterfly Quilt

Construction
The Butterfly Quilt was hand pieced, using the English Paper Piecing Method.  This involves tacking each piece of fabric over a paper template, to give it shape and structure, and then sewing the pieces together.  I tend to leave all the paper in until the top is complete, again, to keep its structure.  I find that this method leaves me with a dead flat top at the end. 

This was a great project.  I spent hours playing with fabrics from my stash and choosing the colour combinations.  It was a great portable project too.  I used my train journey to work to cover paper templates and piece blocks, and it went on many car journeys, as well as holidays to Amsterdam, France and the USA.  This is where all the action took place, and without a fuss, quietly the blocks came together. Once the blocks were together I decided it needed a border to frame it.  I pieced 2.5” x ¾” strips together out of the scraps, and that made up the border, along with calico borders. In a large quilt like this, don’t underestimate how long it will take to remove the paper templates!  For the back of the quilt, I used the same cream calico as on the front.
 
Before I put the sandwich together I needed to add the 64 antennae. The antennae of the butterflies are hand embroidered, using a backstitch, in a regular stranded embroidery cotton.

The wadding in the middle is 100% polyester.  All I remember about it is that I wanted one piece of wadding, and with the large quilt, my choices were limited.  I had also previously had a BAD experience hand quilting cotton wadding, which ‘bearded’ on a navy background, so I knew I wanted to give that a wide berth.  Having used the quilt daily for several years, I still really like the feel of it.
Quilting
When it came to the quilting, I knew I wanted to hand quilt it, but I didn’t know where to start.  As the top gradually came together, I knew I had to do something about it, so I booked onto a
Sandie Lush Hand Quilting Workshop, at Busy Bees, in Newport. That was a brilliant class, and I left with the confidence to start quilting the Butterflies Quilt.  I didn’t know what to quilt on it, so I made up my own pattern (not without MUCH deliberation), having outlined the butterflies, and ‘stitched in the ditch’ of their bodies.  I remember quilting this quilt quite distinctly. It was July and August in 2006.  It was HOT.  And I was underneath a quilt, hand quilting.  I was quilting to a deadline – I had entered it into the NEC Festival of Quilts in Birmingham, so it had to be done, ready for delivery in August.  Without the deadline, I think I would have done more quilting on it. 
Butterfly Block Scrap Quilt
Example of Butterfly Quilt Block
Once complete, I washed it in the washing machine.  I had been dragging this quilt around with me everywhere for a couple of years.  The cat had regularly sat on it whilst I quilted, and the heat of the summer meant that more recently, it had taken the brunt of my perspiration.  It washed up a treat on a 40 degree wash, and luckily the sun remained out long enough for it to dry outside on the washing line. However, almost immediately, it was packed up and taken to the depot where they were collecting the quilts for the show.  I was missing it already.
Further information about the Inspiration Behind the Butterfly Quilt can be seen in earlier posts.