Showing posts with label Red and White Pinwheel Quilt. Show all posts

Monday 3 February 2014

Red and White Quilts - Sew Cal Gal Quilt Show

Red and White Pinwheel Quilt, July 2013
Over at Sew Cal Gal, they are hosting a  "Year of Red and White Quilt Challenges".  Red and white quilts?  Here? On this blog? For once, it looks like Fabadashery has lucked out!

Red and White Pinwheel Quilt
Starting off with a Quilt Show of Quilts Made Prior to 2014, I am offering up my Red and White Pinwheel Quilt. Regular readers will be familiar with it.  It was a BIG FINISH for me last summer and it was displayed in the Festival of Quilts in Birmingham.  The design was my own, inspired by antique quilts.  I did draw up the design in Electric Quilt for reference, but mainly I just muddled along.  The reverse is a red and white spotted Laura Ashley fabric, which had been lingering in my stash for many years.
Red and White Pinwheel Quilt
The quilt was hand stitched using the English paper piecing method, and hand quilted. Red is probably my favourite colour.  Red also has a tendency to bleed - but see how vibrant the red stands out against the white - it is all thanks to the Colour Catcher.

Suzi the cat under the Red and White Pinwheel Quilt
Meanwhile, I have been working on my Red and White Nearly Insane Quilt (which is due a 1 Year Anniversary reveal soon ...).  I hope I will be joining up with Sew Cal Gal again later the year.

Sunday 26 January 2014

Nearly Insane Quilt - Block 31

Block 31 - Nearly Insane Quilt Boutis French
Block 31 - Nearly Insane Quilt
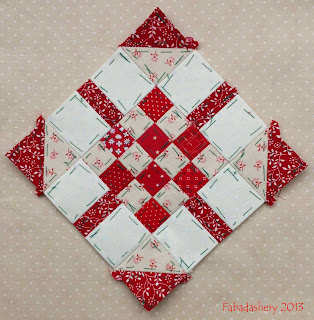
It feels as if this block has the least pieces in it so far, at just 20.  Looking back through the blog from the past year, in fact I have had some with less. The original of this one has 24, but my final design had two square blocks next to each other which were the same, so I merged them.  I have added pieces in other blocks, so I thought it was fair enough.

You would think that just 20 pieces would make it easier, but I find the blocks with just a few pieces in them, far more challenging to select fabrics for.  I came back to this one several times, and even now, I am not quite satisfied with it.  The next one I am working on has over 150 pieces and I am much happier!

NUMBER OF PIECES:  20
DIFFICULTY: 1/10
SMALLEST PIECE: Rectangle 3" (76mm) x 1 1/2" (38mm)
LARGEST PIECE: Triangle, 2 1/16" (59mm) x 1 1/2" (38mm) x 1 1/2" (38mm)
TECHNIQUE: English Paper Piecing (EPP)
FABRICS:
Days Gone By for Exclusively Quilters (Rose Print & Cherry Print)
Berry Falling Snow by Kate Spain for Moda #27127-11

Sunday 15 December 2013

Part 3 - Bonnie Hunter's Celtic Solstice Mystery Quilt 2013

Part 3 - Celtic Solstice Mystery Quilt - Pinwheels
Are you enjoying Bonnie's Mystery Quilt as much as I am?  I can't believe we are into week 3 already.  This week it has been half square triangles and pinwheels.  I love pinwheels, as you can see here, and here.  Also, I am enjoying my cheerful colour scheme, especially on a day like today, when it has been so dark and dreary.
Part 3  Celtic Solstice Mystery Quilt - HSTs
Part 3  Celtic Solstice Mystery Quilt - HSTs
These are the only four pinwheels I have done so far.  I dithered over the number of pieces I had to cut out.  I must admit that cutting out the pieces and lining them up is my favourite bit.

Cutting from strips - Celtic Solstice Quilt
Bonnie is always referring to queries from her reader about how long the strips should be when cutting out, so I thought I would show you my selection.  You can see that they vary - a lot! Some are charms squares, some are the width the fabric comes off the bolt.  There is no science to it, I just make an estimate of how many strips I need, and cut more if I am short.
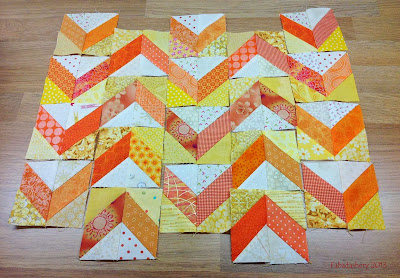
Part 2 - Celtic Solstice Quilt - Chevrons Bonnie Hunter
Part 2 - Celtic Solstice Quilt - Chevrons
I got really behind last week, and even though I had cut out the pieces, Bonnie had published Part 3 before I had really started sewing Part 2.  I was determined to keep up, so this weekend has been a bit of a catch-up, but all my chevrons are now complete.  I took time to press each piece in the right direction and it paid off when I started sewing them together.

1 1/2" triangles - Off-cuts Celtic Solstice Quilt
1 1/2" triangles - Off-cuts
After all the trimming of the chevrons of Part 2, I have accumulated the inevitable pile of 1 1/2" triangles.  I still have the off-cuts from a similar exercise we did for the Easy Street Mystery Quilt. What did I do with them?  I would love to say I have converted them into placemats for Christmas gifts, but no, they have gone in the bin. One less thing to worry about in 2014!

Friday 16 August 2013

Pets On Quilts Show 2013

Cat On Quilt Category - Princess Suzi on Red and White Pinwheel Quilt
This is our entry for 2013 for the 'Cat on Quilt' Category in the Pets on Quilts Show 2013, hosted by LilyPad Quilting.  It is a picture of Princess Suzi looking cute and cuddly on the Red and White Pinwheel Quilt.  Yes, it is back from the show, and now it can be smothered in cat hair, just as all good quilts should be!

This competition journey has not been an easy one.  Earlier in the week, I faced an all out strike, by both cats.
Where has Suzi gone?
Then, once Suzi realised the Red and White Pinwheel was finally in circulation, I think she misread the brief - and did Pets Underneath Quilts.

Suzi under the quilt
Once enticed onto the top of the quilt, realising the importance of the photo - ie: to win fabric for owner, she spent over an hour cleaning herself in preparation.  The clock was ticking, but finally, we managed the photo at the top of the page, which is our official entry.


Cat choosing fabric for Easy Street Mystery Quilt
Suzi choosing fabric for Easy Street Mystery Quilt
A bit of background: Suzi is about 8 years old, and joined us from another home last year, and having never done any sewing in her life before, has become a keen quilter in a very short time. Her first major project was the Easy Street Mystery Quilt, and she particularly enjoys machine piecing.  She has also won fabric for her owner before. 
Cat taking a rest from Quilt Inspecting
Sparky taking a rest from Quilt Inspecting
Not to be missed out, above is a snapshot of Sparky on one of his quilted cat mats.  He is about 17 years old, and was adopted from my sister.  He has always been keen on testing out the quilts, especially at the 'design floor' stage.  Dedicated to his work as a Quilt Inspector, he actually wore one of his eyes out earlier this year - talk about dedication!
 
Cats. Quilts. What is there not to like? Pop over to Lilypad Quilting to see lots of other cats, almost as cute as mine. Judging this weekend!

BEWARE: there may be some dogs there too.


Friday 2 August 2013

BIG FINISH - Red and White Pinwheel Quilt, Hand Pieced, Hand Quilted


Red and White Pinwheel Quilt - Hand Pieced, Hand Quilted
Well, here at Fabadashery it is not often you get to see a BIG FINISH like you will today.  Usually you have to satisfy yourself with the little 6 inch Nearly Insane blocks that I am working through.  But my efforts of recent weeks have paid off, and I have completed my Red and White Pinwheel Quilt, in spite of the little trauma of washing it. 

Completed - Red and White Pinwheel Patchwork Quilt
It is a single bed quilt, hand pieced and hand quilted. I devised the design myself, with the assistance of my Electric Quilt software, and inspiration from antique quilts on the internet.  I love the look of red and white quilts like this, and would have loved to have seen the American Folk Art Museum exhibition: Infinite Variety, Three Centuries of Red and White Quilts, but it was just too far away, but I have downloaded the App onto my iPAD, and now I have my very own.

Back - Red and White Pinwheel Quilt
The backing is a piece of red spotty Laura Ashley fabric which has been in my stash for years.  I started the quilting at the beginning of this year, and it was completed 26th July 2013, (having an exhibition deadline definitely helps to get this sort of thing done....)


I probably started making the little pinwheels at the end of 2009, as I remember it being my hand piecing project whilst we were building our house.  The top was complete by January 2011, and the sandwich put together ready for quilting.  Having known this quilt for so long, there are a few things I may have done differently, and it is by no means perfect, but it is a finished quilt!  Anyway, no sooner had I stitched the last few stitches, and the quilt had to be packaged away for delivery to the NEC for the Festival of Quilts.  There were a few disappointed cats in the house, as they have been waiting, and waiting to test it out, but that will have to wait.

If you are heading off to the Festival of Quilts at the NEC in Birmingham 8th-11th August 2013, you can see my quilt among the Traditional Quilts section, No:660.  I can't wait to see it there!
  
Statistics
Dimensions: 150cm x 190cm (approx)
Piecing Method: English Paper Piecing. Hand Pieced
Quilting Method: Hand Quilted
Dates: 2009 – July 2013
Joining up with Sarah, Crazy Mom and Feline Friday today!


Wednesday 31 July 2013

Machine Embroidered Quilt Labels

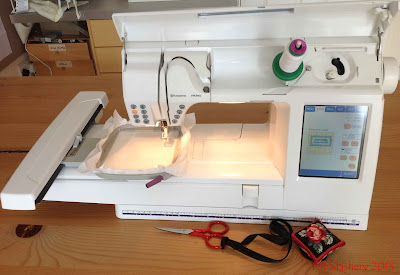
As you have probably gathered by now, I tend to do mainly hand stitching, and like to maintain that integrity throughout the project, by hand piecing and hand quilting.  However, when it comes to doing my quilt labels, I like to use my embroidery machine.

Husqvarna Designer 1 Embroidery Machine, embroidery hoop
Husqvarna Designer 1 Embroidery Machine
In the past I have done a lot of creative machine embroidery, and have the sewing machines and threads to prove it!  Therefore I like to take the opportunity to use my embroidery machine to make my quilt labels.  With the completion of my Red and White Pinwheel quilt, I had the opportunity to blow the dust of this machine and reacquaint myself with the software, to make a little label for my finished quilt.  Watching these machines is mesmerising, and it never ceases to seduce me.  For this label, I didn't even have to put the pedal on, I just used the Start / Stop button!
Stitching Quilt Labels in the Embroidery Hoop
I have got into the habit of doing my quilt label stitching in the same colour as my background fabric, like I did on my Single Irish Chain Quilt, and again, I have gone for white on white for this quilt.  I think it is important to put a label on, and I would rather have a stitched label than a handwritten label, but I don't like them to shout too loudly from the quilt.  If you can even see it, I have just put my name, date, and location on the label, with a little stitched diamond border around it. Subtle.

We all like to do things differently - how do you like to mark you quilts?


Sunday 28 July 2013

Washing Quilts - In Praise of the Colour Catcher

You may have noticed that lately my blogging has not been as prolific, and that I may not have had the chance to comment and respond to your kind comments.  Apologies. My excuse is that I have been busy completing my Red and White Pinwheel Quilt ready for the deadline for the NEC Festival of Quilts, which is being held in Birmingham on 8th-11th August 2013.Besides being time consuming, and having to quilt on the hottest day of the year, there have been a few other traumas along the way which I though I would share with you. 
 
As you may know, for marking this quilt I have been using the blue Wipe Off Fabric Marker, to draw on my quilting lines.  I have  found it really successful, and would use it again.  However, to start with, I was removing the blue pen marks as I went along, which was fine until I realised a problem.
 
I am not *stupid*.  When I made the decision to make a red and white quilt, the first thing I made sure of was that I gave the red solid I was going to use, a good 60 degree wash, to make sure that the colours would not run. However, somewhere along the way, I completed the top and put the sandwich together, using  a lovely red spotty fabric, and started quilting.  My eye may have been off the ball at the time, as we were building a house.  It was not until quite far along the quilting process, when I was removing the blue Wipe Off Fabric Marker with a very damp cloth, that I noticed that the water had caused the dye from the red spotty backing fabric to bleed onto the white of my quilt ..... take a deep breath
 
Red dye bleeding onto white fabric Colour Catcher
Red dye bleeding onto white fabric
It was difficult to proceed with my quilting until I knew for sure that when the quilt was finished it would be a Red and White Pinwheel Quilt, not a Pink and White Pinwheel Quilt. Luckily, I still had some of the backing fabric spare, and I decided to do a test run.

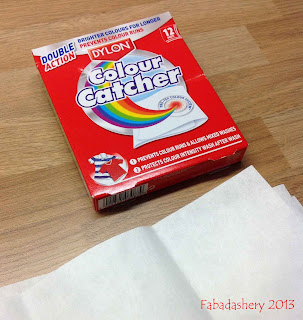
Dylon Colour Catcher
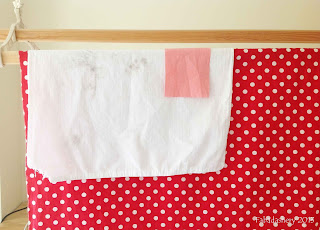
I put some yardage of the spotty red fabric, an old white pillowcase, and a Dylon Colour Catcher sheet in the washing machine on a warm wash, and waited for the results.  As you can see it all worked out perfectly.  Yes, the colour did run, but the Colour Catcher did the trick of collecting the loose dye particles. 

Washing Quilts - Colour Catcher Test Run
Quilting of the Red and White Pinwheel Quilt continued right up to the deadline, but before it was packaged up and delivered, it had to be washed.  Even with the test I had done, and the results plainly in front of my eyes, somewhere inside of me still had some doubts, and I had reservations about this moment. A few days before, I noticed a comment by Karen at Celebrate Hand Quilting about washing quilts, and I contacted her for some reassurance. Thanks Karen for your advice, at the right time! 

The quilt went in the washer on a COLD WASH, with NO detergent, with FIVE Colour Catchers.  At this point I still had the blue markings on the quilt, and I needed to rinse them away, without detergent, which worked a treat.  Within a few minutes, with the loose red dye, it looked like a bloodbath in the washing machine, and I could see that all the Colour Catchers had taken up a lot of dye ... take a deep breath.   

So I drained the first round of water off, replaced the Colour Catchers with FIVE MORE, and started the process again.  There was a lot less red dye in this wash, but the Colour Catchers still took up a lot of red, as you can see from my final collection of Colour Catcher sheets drying on the sink in the laundry room.  Once this was rinsed, I finally did a wash with some detergent in it, and THREE Colour Catchers in it.  By this point I had moved onto a different packet of Colour Catchers, and I found that Dr Magic Snatch a Dye, which I purchased from Lidl, works just as well.

Red and White Pinwheel Quilt drying on the Sheila Maid
As you can see  - the final results show a Red and VERY White Pinwheel Quilt, which I am very pleased with. During all this time, my husband has been thoughtfully searching for Red and White Pinwheel Quilts on Ebay - just in case.
I never really had an interest in Chemistry when I was at school, but I would like to thank  all the Chemists that were involved in the development of this wonderful product - the Colour Catcher.

Friday 28 June 2013

Nearly Insane Quilt Edge Blocks - Block 92

Suzi helps out with the hand quilting
Suzi the cat helps out with the hand quilting
It's that time of year. It reminds me of the days when I would be sitting doing revision for exams.  The sun would be out, you would be working to a revision schedule, and your life seemed paralysed, knowing that every waking moment HAD to be dedicated to doing what you could to prepare for the looming examinations.  To add to the pain, ALL you could do is  think about all the things you will do once the exams were out of the way!
This time around I am hand quilting a quilt for a show.  The delivery deadline is one month away, and every spare moment is focussed on sewing, and even just a few stitches a day will bring it closer to its completion.  I have noticed, as I surf the internet, that I am not the only one in this predicament. As you can see, I am getting a lot of help from Suzi, who can't wait until it is back from the show and in full circulation. All I REALLY want to be doing is more of my Nearly Insane Quilt, or to use the fabric, and to do some of the small projects I brought back from my trip to the USA, but this self-imposed deadline has taken over my LIFE!
Nearly Insane Quilt Edge and Corner Blocks
Nonetheless, I have used my usual tactic of taking the train to work to get my Nearly Insane Quilt blocks done (... the quilt is too big to take on the train!).  For a quick win I have focussed on an edge block, Block 92, which was originally meant to be the corner blocks.  In the top picture you can compare Block 92 (top), to the corner blocks Block 87 (bottom), ( ... I think I might choose another block to do the final two corners, just to mix it up a bit).  This block was done on my train journey and during my lunch break, whilst I sat outside in the sun by the canal.  I'm not sure that I quite got the fabric choice right, but it soon came together.
Nearly Insane Quilt Block 92 (Edge Block)
This block was simple enough, but you may overlook that it had two little TINY pieces in it, very similar to the ones in Block 1.  In small groups these tiny pieces look harmless, but I am starting to be on the lookout for the blocks where they appear in greater numbers.

So it is back to quilting. However, this weekend is offering up some good television entertainment, which is VERY good for quilting.  We have the start of the Tour de France, the British Formula 1 Grand Prix, and even the new series of Top Gear.  I hope to get a lot done.

Joining up with  Crazy Mom Quilts AND Feline Friday!

NUMBER OF PIECES: 24
DIFFICULTY: 4/10
SMALLEST PIECE: Triangle, 3/84 (1.9mm) x 1 1/16" (27cm) x 1 1/16" (27mm)

LARGEST PIECE: Square 1 1/4" (32m) x 1 1/4" (32m)
TECHNIQUE: English Paper Piecing (EPP)
FABRICS: 

Rural Jardin by French General (Leaf Trail Rouge) for Moda
Quilters Basics (Memory) Stof
"Polka Party III" by Holly Holderman, Lakehouse Drygoods (#03035)
 

Friday 21 June 2013

Nearly Insane Quilt - Block 28

There was a point when I thought the next Nearly Insane block would never get finished.  As you may know, all my stitching time at home is currently dedicated to hand quilting the red and white pinwheel quilt, which has left little room for the Nearly Insane blocks.  After finishing so many blocks whist on holiday in the USA, I was beginning to get withdrawal symptoms.  However, by adjusting my travel plans over the past week, I have managed to finish the next block on the train to work.
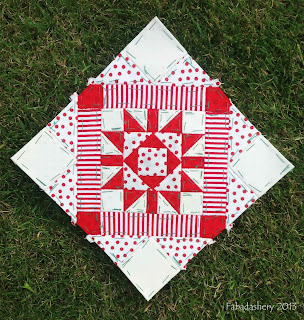
Block 28 Nearly Insane Quilt
This is Block 28.  I really like it - but I seem to be saying that about all the blocks these days!  I think I particularly like this one because I have included stripes.  Whenever stripes are added to a block / quilt,  I think they add a dynamism and pizazz, like no other pattern, and I really like it.
The little half square triangles (HST's), in the centre, are about 3/4 inch square, and not too insane for me to handle, so even if a whole block was made up of these little HST's, that would be 128 pieces in a 6 inch block.  However, the most pieces in any one block is 229...
In Liz Lois book she mentions how after doing her first block for this quilt, she was hooked, and that she just had to do more.  I know exactly how she feels.  SHE reckoned it was better than chocolate ( .... however, I think my long-standing relationship with chocolate has been established far too long to be challenged).
Sparky the Cat with Nearly Insane Quilt Block 28, June 2013
We have had a few hot days here in the UK, and Sparky has been enjoying the warmth on his old bones, and kindly offered to pose with the new block outside.
 
NUMBER OF PIECES: 53
DIFFICULTY: 3/10
SMALLEST PIECE: Triangle 7/8
" (22mm) x 3/4" (19mm) x 3/4" (19mm)
LARGEST PIECE: Square 1 3/8" (35mm) x 1 3/8" (35mm)
TECHNIQUE: English Paper Piecing (EPP)
FABRICS: 

"Berry Falling Snow" by Kate Spain for Moda #27127-11
"Quilter's Memory" Stof Quilter's Basics #4517-118
"Polka Party III" by Holly Holderman, Lakehouse Drygoods (#03035)
Red and White Stripe (purchased from Hobbycraft)


This one needs a Whoop Whoop!, a Finish Up Friday, and a Feline Friday link.

Monday 17 June 2013

Hand Quilting Progress - Red and White Pinwheel Quilt

Marking cross-hatching for hand quilting
on Red and White Pinwheel Quilt
My Nearly Insane quilt activity seems to have been put on the back burner for the time being.  Instead, I am currently trying to catch up with my hand quilting back log, which as you can see is STILL the Red and White Pinwheel Quilt.  As you can also see, I am still using the Wipe Off Fabric Marker, which I am finding works well.  What I have found is that you need to remove it with a wet cloth rather than a damp cloth - it is the water that removes the blue mark. So far, so good.
To get this one moving, I needed a deadline, so I have entered the quilt in a show, and now I am frantically quilting to get it done.  Mind you, the pace I am going could not be mistaken for 'frantic', as there is a lot of stitching for what seems like meagre progress.  The overall plan is not fully worked out, and the more I do, the more I feel I need to do, as well as the binding, plus the hanging tab, and the quilt label.  I can see myself stitching, just minutes before I hand it over!
Book: "Quilt It!" by Barbara Chainey

I would not say I am an expert at hand quilting, and don't feel that I have quite mastered how to choose a quilt patterns for particular quilts, but one book I find really useful is Barbara Chainey's 'Quilt It', as it gives loads of suggestions, especially for pieced work, rather than patterns for whole cloths.  I have designed some motifs of my own for this quilt, plus a lot of outline quilting, and at the moment I am working on some cross-hatching. 
It will get done.

Joining Up with Design Wall Monday! and Slow Stitching Sunday.
 

Thursday 16 May 2013

Celebrating Hand Quilting and Laura Ashley 60th Anniversary


Red and White Pinwheel Quilt Laura Ashley Spot
Red and White Pinwheel Quilt
Laura Ashley Red Spotty fabric

Over at Celebrate Hand Quilting they are hosting a blog hop this week.  It is well worth a look, as hand quilters all over the world are sharing their love for hand quilting.  I am not part of the Blog Hop, but I thought I would take this opportunity to show you my current hand quilting.
This is my current hand quilting project, my Red and White Pinwheel quilt, and on the reverse it is backed with a red spotty cotton lawn that I bought in the Laura Ashley sale many, many years ago.

Vintage Laura Ashley fabrics 1980s - 1990s

If you delve into my everyday fabric stash (as opposed to my quilting fabric stash), you will find that it is largely made up from lengths of Laura Ashley dressmaking fabric purchased in the sales back in the 1980s and 1990s.  In those days the Laura Ashley Sale used to be a phenomenon, with people queuing around the block to get in.  I know -  I stood in the queue!  I always used to make a bee-line for the dressmaking fabrics, which were either Seconds or left overs from a print run which had been used to make last seasons dresses. Most of it was a lovely cotton lawn, very similar to the Liberty Lawn fabrics, but at a fraction of the price at £1.99 a metre. In those days I used to make loads of colourful summer shorts and trousers out of the fabric, and used to wear them until they were threadbear. Some of the fabrics you see here are old Laura Ashley skirts. I even have a set of the patchwork kits in my stash. Happy Days!

Today I have just heard that Laura Ashley are putting on a pop-up exhibition of their vintage clothes, celebrating 60 years, on 13th and 14th June 2013, in  London.  As it is on for such a short time, tickets are limited.  Not sure if I will manage to get up to London, but it would be great to see.

Also, between 13th July - 26th August 2013, the Museum of Costume in Bath, UK, is holding an exhibition alongside their normal display of historical costume, "Laura Ashley - The Romantic Heroine", which features the Romantic Style which she influenced during the 1970s.  It's a great costume museum, with a collection on par with the Victoria and Albert Museum in London.

If you have nostalgic memories of Laura Ashley, Ann Rippin has a blog, and has a strong interest in how Laura Ashley fabric touched everyday lives and their patchwork and quilting, and there may be an opportunity to get involved in her research.
 

Sunday 21 April 2013

Hand Quilting - Wipe Off Fabric Marker

I have been enjoying doing my Nearly Insane Quilt blocks far too much lately, and felt that I needed to spend some time on hand quilting my red and white pinwheel quilt.  I have got a self-imposed deadline for completing it, which is approaching fast.
Having completed the outlining, I am now quilting the motif in the centre of each square.  I designed the motif myself and made a template out of some heavy plastic to draw around, several months ago. For the first one I had used a watercolour pencil, but having watched a video tutorial by Judi Madsen at Green Fairy Quilts, I thought I would try a Sew Easy Wipe Off Fine Line Fabric Marker to mark the quilting pattern.

Sew Easy Wipe Off Fabric Marker Pen
The idea of drawing in pen on my nice, white quilt, filled me with apprehension, so I have documented it, mainly to remind myself how it went for my own future reference.  Drawing the pattern on was easy enough, as the tip of the pen is really fine - good accuracy. I can never guarantee how long a hand quilting project will take, it maybe years, so I am only doing one motif at a time, as I am not sure how long the pen will last.
Motif marked onto quilt with Fabric Marker Pen
Once I had hand quilted the motif, I dampened a microfibre cloth, and wiped the marks away.  As you can see below, yes, it really did wipe the blue pen marks away! Just like magic!

Wiping off Fabric Marker Pen, with a microfibre cloth
However, when I looked again the following day, I noticed that there were some blue stains lingering, mainly at the points where I stopped the pen when drawing around the quilt template. 
Remaining blue stains, after 12 hours
I have given it another rub, and it seems to have got rid of the lingering blue stains, and I will check it again before I give it its final wash.  I don't want to rub the quilt too much though.  I guess until I finish the quilt, and  give it a good wash, I am not going to know for sure whether it has worked or not.

Here are the instructions for reference.

Instructions:
All Fabric Markers should be pre-tested on a scrap of your fabric first, for both application and removal.
All temporary markings must be removed before ironing or washing in detergent. Avoid direct sunlight or heat.
To remove marks, simply wipe off with a damp cloth, or rinse out in cold water.

Sunday 31 March 2013

Nearly Insane Quilt - Block 61


Block 61 - Nearly Insane Quilt, March 2013

Happy Easter!
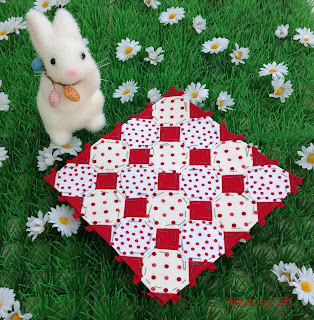
 Another lovely quilt block from the Salinda Rupp, Nearly Insane Quilt.  Part of the fun on this journey has been searching the internet to see how others have approached each block - it is amazing how differently they all turn out.  I like this block, mainly because I have used the Solid Red for the centres.  I think it is just a perfect red, and has a real intensity, especially when placed next to other reds.  It is the remainder of the solid red fabric I have used in my red and white pinwheel quilt.

For difficulty I have given  quilt block a 5/10.  I believe this block is known as a Snowball Block, which is made up from an octagonal shape, rather than hexagons.  Despite being a long time English Paper piecer, I have never really got myself involved in hexies, and actually I found them a bit fiddly.  I was always having to change direction, and when wrapping the fabric around the paper template, one seam always ended up much smaller than the other, by the time I had gone around the octagon.  Also, it was only once I started to piece the block together that I noticed the sides of the octagon were not the same length, and this meant a bit more concentration when  putting it together.  The biggest headache was deciding whether to stitch in red or off-white thread - in the end there is a mix. So it gets 5/10.

On the original pattern there are more pieces, as the centre squares are made up of four triangles, but I have chosen to keep it as a solid square.

As well as this block, I have also been preparing some of the cornerstones and sashing for the quilt.

I hope you like my seasonal photo of Block 61 of the Nearly Insane quilt. (I thought the green grass would tie in with my green tacking stiches nicely...).


NUMBER OF PIECES: 41
DIFFICULTY: 5/10
SMALLEST PIECE: Square, 1" (25mm) x 1 11/16" (17mm)
LARGEST PIECE: Rectangle 1" (25mm) x 1 11/16" (17mm) x 1 11/16" (17mm)TECHNIQUE: English Paper Piecing (EPP)
FABRICS: 
Kona Cotton (Solid Red) by Robert Kaufman
"Polka Party Petite" (Buttercream) "Lakehouse Dayz" Collection by Holly Holderman, Lakehouse Drygoods (LH05037)

"Quilter's Memory" Stof Quilter's Basics #4517-118

Friday 22 March 2013

Nearly Insane Quilt - Block 12

Block 12 - Nearly Insane Quilt Red and White
Block 12 - Nearly Insane Quilt
Introducing Block 12. I like this one.  I will confess that I have slightly altered this block, by reducing the number of pieces in the edge strips, to make the pattern the same on each side. Like Block 92, it was the symmetry issue.   If anyone is following this Nearly Insane Quilt journey for an 'exact' representation, they need to be aware that I like to make my own mark - and I am finding that the urge is growing! 

Initially, I was struggling with the fabric choice with Block 12 until I made the pattern alterations, and then decided to mix it up a bit by using the different red and white charm squares for the centre of the block - the ones which I pulled out from my fabric stash in my original fabric selection.

Red and White Charm Squares - Nearly Insane Quilt
They are only 1 1/2" squares, and I wasn't sure how I was going to incorporate them when I started the project, but I think Block 12 in the Nearly Insane Quilt is perfect place for them.  They were a neat fit over the bits of paper for the English Paper Piecing, and add a scrappy look to the block.  Against the French General fabric, I think they look really cute. 
3/4 " Red Charm Squares, with French General Fabric, Moda  Nearly Insane Quilt
3/4 " Red Charm Squares, with French General Fabric, Moda
I have recently been quilting my red and white pinwheel quilt, and although I like the quilt a lot, looking at just the plain red and the plain white has been a touch boring. It has really made me realise that my heart is with scrappy quilts. In fact, as I laid out these squares, which are only 3/4" square, my mind did wander to the idea of doing a whole patchwork quilt in this layout, in a similar vein to my Single Irish Chain Charm Quilt, but with just 3/4" squares.  It would be a simple quilt, but wouldn't it be lovely, especially in the red and white colourway?

NUMBER OF PIECES: 36
DIFFICULTY: 2/10
SMALLEST PIECE: Square, 3/4" (17mm) x 3/4" (17mm)
LARGEST PIECE: Rectangle 1 1/2" (37.5mm) x 1 1/4" (32.5mm)
TECHNIQUE: English Paper Piecing (EPP)
FABRICS: 
Mix - White on Red Charm Squares
White dot on Cream (purchased from The Shuttle)

White Floral on Red (purchased from The Shuttle)
French General Favourites - Pearl  for Moda #13526 14

Joining up with Finish it Up Friday!

Thursday 21 March 2013

Red and White Pinwheel Quilt - March Update

Hand Quilting the Red and White Pinwheel Quilt
Over the weekend I did lots of hand quilting on my Red and White Pinwheel Quilt.  At the moment, I am just stitiching around the pinwheels, but I did manage to complete that stage, at least.  It is slow because I am having to stitch along the edge of the seams, but I do love the way that hand stitching slowly calms down a quilt top.  I have a motif prepared waiting for the centres, but no plans for the borders or the edges.  I tend to let it evolve as I go along, ( ... in answer to Leanne's contemplation about Quilting Decisions, at Quilt Wangarei from New Zealand).

TOP TIP: You will see a scrap from 'A Morris Tapestry' by Barbara Brackman which I used in the Mini Hexi Mug Rug that I made, which I am using as a contrasting marker, to spot where I have I have left my needle. Finding the white thread on the white background can be challenging!