Showing posts with label fabric. Show all posts

Saturday 2 March 2013

Nearly Insane Quilt - Block 55

My quilting progress has been limited this week, but I do have a finish to share.  Using my travel time on the train I have been working on Block 55 of my Nearly Insane quilt. It's amazing how much you can get done on just a short journey, but with these little pieces, one false move and they could be travelling the length of the country!
English Paper Piecing on the train
Its a quirky little block, and I quite like it, and I have learnt a few techniques and ideas which will be useful for future blocks. 
Block 55 Nearly Insane Quilt Red and White
Block 55 Nearly Insane Quilt
Overall this block was not too difficult. Extra care was needed to make sure all the right pieces were in the right place. The striped pieces are asymmetrical, so you need to make sure you have got them the correct way around (I know because I had to unpick one!). Also, remembering that the blocks will be on point, I need to take extra care when cutting any directional fabric, to make sure everything is pointing in the right direction - my hearts seem to be all a flutter on this one.
Block 55 Nearly Insane - English Paper Piecing
I know that some future blocks are going to have over three times as many pieces as this block, but I think Block 55 is fairly unique in that the majority of the 46 pieces are all slightly different sizes.  To manage this, I numbered all the papers AND all the pieces of fabric, and for further control I used my Clover Wonder Clips to keep certain groups together.  BTW, I also noticed this week on the Keepsake Quilting website, that Clover are now making these clips in JUMBO SIZE.

Clover Wonder Clips English Paper Piecing
Clover Wonder Clips
So that block marks the completion of the ones chosen in my first draw. Having done this first set, I have had time to think about how to combine my fabrics on forthcoming blocks.  I have also put some thought to the border, sashing and cornerstones. On the side bar there is a thumbnail of the quilt, created in Electric Quilt 5 software, which shows my progress so far.

NUMBER OF PIECES: 46
DIFFICULTY: 3/10
SMALLEST PIECE: Square, 1/2" (7.5mm) x 1/2" (7.5mm)
LARGEST PIECE: Triangle, 1.5" (42mm) x 1.5" (42mm) x 2 5/16" (59m)
TECHNIQUE: English Paper Piecing (EPP)
FABRICS: Apple Red Text on Cream (#5490) "Mama Said Sew" Collection by Sweetwater for Moda
Songbird (C2863) by Carina Gardner for Riley Blake Designs
Hearts on Red (567-R5) Makower
Red Dots on White Fabric (Unidentified)
Scattered Red Stars on White (Unidentified)
Red and White Stripe (unidentified)

Celebrating this finish at Crazy Mom Quilts

Friday 22 February 2013

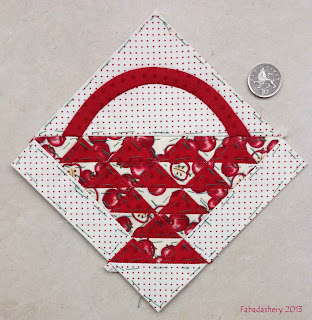
Nearly Insane Quilt - Block 41, Basket Block

Apple Patchwork Fabric - Nearly Insane Block 41
How cute is this apple fabric?  I recently picked it up as a remainder fat quarter at Country Threads in Bath.  It is not strictly the red and cream scope of my Nearly Insane Quilt, as it has a tiny bit of green and yellow in it, but I thought it would add some 'character'. 
Block 41 is a fairly traditional patchwork Basket Block, so I thought I would pair this up with the Minick and Simpson "Christmas Past" red spotty fabric that I have talked about in the past, to make this block an 'Apple Basket'. I have added a 10 pence coin to give some scale to the finished 6 inch block.

Block 41 - Traditional Basket Block, Nearly Insane Quilt
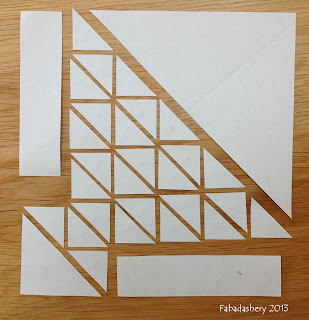
Here are the 31 paper pieces that make up this block, plus the handle of the basket which is an appliqued bias strip.
Block 41 Nearly Insane Quilt - Basket Block
You will see that during the construction of this English Paper Pieced block the incremental growth of the strip due to the fabric being wrapped around the paper, meant that I had to fit a 4 5/16" strip of half square triangles onto a 4" plain strip.
English Paper Piecing, Nearly Insane Quilt Fabadashery
English Paper Piecing
The easiest way I have found to counter this is to level up the ends and start sewing (Stage 1).  By fixing the two pieces together at the beginning, you can then start to manipulate the two pieces, so that they are eventually a perfect match.
English Paper Piecing, Nearly Insane Quilt Fabadashery
Stage 1
Once they are fixed by a few stitches, I then bend the two pieces around my fingers, with the longest edge on the outside.  Like a race track, the outer piece has to travel further than the inner piece, and with a bit of a 'jiggle', you can get them to line up (Stage 2).  For further accuracy, because the fabric is on paper, the paper can be folded in half, and I tend to use the sharp creases as markers to match up as you fit the two edges together.
English Paper Piecing, Nearly Insane Quilt Fabadashery
Stage 2
Always check it as you are going along, unfolding the seam to adjust, giving it a tug here and there to ensure that there will be no overlap at the end (Stage 3).  It is easier to adjust just a few stitches that the full length of the seam.
English Paper Piecing, Nearly Insane Quilt Fabadashery
Stage 3
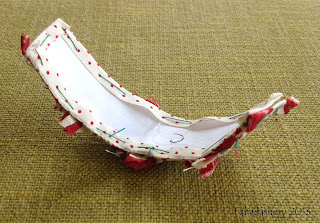
At the end, the two edges of the pieces should be sewn together with no overlap.  As you can see from the picture below, the end result has a bit of a bend in it.  
English Paper Piecing - Block 41, Nearly Insane Quilt
Never fear.  In this situation I tend to give the joined piece a good steam with the iron.  Also, at the moment the pieces are being held rigid by the paper, once they are finally removed, the shape of the block will be fixed by the sashing, and it will then be able to relax and mould itself into place.  This technique works for me, but probably only because I am confident that the papers will keep the shapes accurate. I know there are some 'corkers' coming up where the half square triangles are half the size of these, and there are many more of them. I think I will just take each block at a time.

English Paper Piecing, Nearly Insane Quilt Fabadashery
Basket Block 41, Nearly Insane Quilt
I built up the block for piecing into smaller blocks, but this was not before I had added the bias strip basket handle, which I appliqued onto the large triangle.  I make my bias binding using a cheap and clever technique I picked up at a Sandie Lush Applique Workshop at Busy Bees Patchwork in Newport.
English Paper Piecing, Nearly Insane Quilt Fabadashery
Folding Bias Binding using a Pin and Ironing Board
I cut my bias strip 1" wide, for a 1/2" wide handle on my basket block handle.  To set the width of the bias strip, I secure a pin to the ironing board, with a 1/2" gap, which I then feed the folded bias strip through, pressing as I go.  By adjusting the pin you can make a bias strip of any width.
English Paper Piecing, Nearly Insane Quilt Fabadashery
Attaching bias strip for handle
I sewed on the bias strip with the paper still inside, and following the line on the paper which was visible through the spotty fabric.  Then, when I sewed the two halves of the block together, I hid the ends of the strip in the seam. 
This seems like quite an epic post for this unassuming block, but once I worked out what I was doing, this block was not too bad.  I know this block also makes up some of the edge blocks, so down the line maybe I will have a 'Cherry basket' too!

With another block finished, this Friday I am joining up with Crazy Mom Quilts.

NUMBER OF PIECES: 31 + 1 (Handle)
DIFFICULTY: 5/10
SMALLEST PIECE: Triangle, 1" (25mm) x 1" (25mm) x 1 7/16"" (36mm)
LARGEST PIECE: Triangle, 5" (127mm) x 5" (127mm) x 7 1/16"(180mm)
TECHNIQUE: English Paper Piecing (EPP)
FABRICS:
"Christmas Past" (14547) by Polly Minick and Lauri Simpson for Moda
Apple Fabric - unidentified
Red Dot on Cream - unidentified

Saturday 16 February 2013

Nearly Insane Quilt - Block 91

Nearly Insane Quilt Block 91 Red and White
Nearly Insane Quilt Block 91, English Paper Piecing
With all the preparation to do the Nearly Insane Quilt, the anticipation for starting had built up into quite a big thing. I thought I would break myself in easily with attempting one of the edge half blocks, Block 91. Overall it did not take too much time.  The tacking can be done quite quickly, and this block came together really easily, in total just a couple of hours of hand sewing at most.
Block 91, Nearly Insane Quilt, Paper Templates
As a half block, it only had 18 pieces, and I was only using two different contrasting fabrics.  The little pieces seem very little, with the seams taking up more fabric than the actual piece on some.  It is tempting to have the seams in proportion to the piece, but you do need the full 1/4" to make the seams more secure. I believe there are much smaller pieces to come.
Nearly Insane Quilt Block 91, English Paper Piecing (Reverse)
As I am English Paper Piecing it, I have not removed the papers yet, and knowing me, I won't do that until the entire quilt (or at least the centre) is put together, so bear with the green tacking thread, I know it is going to become a close friend in the foreseeable future.

NUMBER OF PIECES: 18
DIFFICULTY: 1/10
SMALLEST PIECE: Triangle, 5/8" (16mm) x 5/8" (16mm) x 7/8" (22mm)
LARGEST PIECE: Rectangle, 2.5" (63mm) x 1.25" (31mm)
TECHNIQUE: English Paper Piecing (EPP)
FABRICS:
"Polka Party Petite" (Buttercream) "Lakehouse Dayz" Collection by Holly Holderman, Lakehouse Drygoods (LH05037)
"Lazy Daisy Red" by "Mama Said Sew" Collection by Sweetwater for Moda (M 5494 21)

Friday 15 February 2013

Nearly Insane Quilt - First Draw

The first blocks for the Nearly Insane Quilt have been drawn.  They are blocks
21 - 41 - 55 - 91
I have now printed off the blocks from the Electric Quilt 5 software and made up little portable packs with the cut up paper pieces, the fabric, and the instructions, for these particular blocks.  The drive behind this patchwork project is for when I am travelling, or I am out and about, and I need a small portable sewing project with me.  When I am at home I am MEANT to be catching up on my hand quilting backlog...
Nearly Insane Block Home Made Portable Project Packs
As I mentioned before, the fabric for the sashing and cornerstones have not been finalised, but I am realising that I should be doing these as part of my batch system, so that when the time comes to put the quilt together everything is ready to go.  Actually, I should also be doing some of the zig zag border too .... but I haven't chosen the fabric for that yet either.
What I have noticed is, that besides their number, these Nearly Insane blocks don't have names, so if you recognise any as we are going along, then please shout out any suggestions.

Monday 11 February 2013

Nearly Insane Quilt - Passport Packed!

Before you embark on a journey you need to make your travel arrangements, pack your suitcase with essentials, and arrange for someone to feed the cats.  These are the sort of preparations I have been making before my Nearly Insane Quilt journey.

1.  My guidebook on my Nearly Insane Quilt journey is Liz Lois book which has the templates for each of the 6" blocks, colour pictures of some completed Nearly Insane quilts, and along with some beautiful quilts on the internet, has been the inspiration for the journey in the first place.
Book: Nearly Insane Quilt by Liz Lois
2.  The type of journey I will be going on will be a hand pieced one.  It will largely be English Paper Pieced (EPP), but if there is heavy weather ahead, I am prepared for an alternative route using Foundation piecing.
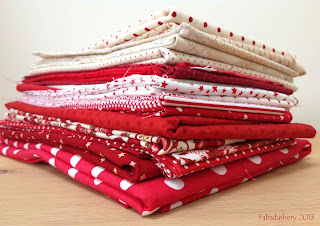
3.  The flavours I will be tasting will largely be red and cream, with some white fabric.  At the moment I have not made a final decision on the fabric for the sashing and the cornerstones.  At the moment the sashing is probably a cream calico and the cornerstones a solid red.  But like any good quilter, I will try to fit in a few 'fabric shop hops' along the way of my journey, where I hope to find something more appealing.

Red and Cream / White Fabrics for Nearly Insane Quilt
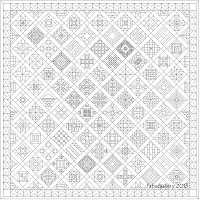
3.  My map on the journey is Electric Quilt 5.  I have already drawn out each block into the software, and set them into the quilt.  I have also scanned all my fabrics in, as a 'Nearly Insane Collection'.  This allows me to print off an accurate block for my paper pieces, and the shapes for cutting out the fabric.  It will also allow me to keep track of my progress, so I know how much of the quilt I have done, and how far I have to go.
Nearly Insane Quilt in Electric Quilt Software Fabadashery
Nearly Insane Quilt in Electric Quilt Software

4. To help decide which route I am taking I have set myself up a lucky draw.  I have cut up each block from the Electric Quilt print out of the whole Nearly Insane Quilt, numbered each block, and put them in a lucky dip bowl. For each draw I will randomly select 3 blocks, and 1 edge half block.  This will allow me to prepare the fabrics as I go along in a manageable way, and set them up in portable project bags, so there is always something ready to do on the go.

Nearly Insane Quilt - Lucky Dip Bowl Fabadashery
Nearly Insane Quilt - Lucky Dip Bowl
I think that is about everything for now.  I will be on this journey for quite a while, but I hope to send you all regular postcards!

Saturday 9 February 2013

Red and Cream Fabric Choice - Nearly Insane Quilt

Now that I have decided to embark on the 'Nearly Insane' quilt, I have spent a lot of time preparing for it.  I will be hand piecing it, probably using the English Paper Piecing method, but I can also see a need to some foundation piecing work for the more intricate blocks.  I have put all the blocks into Electric Quilt 5, and I have also now scanned all my red, white and cream fabrics into the package.  Despite having the Electric Quilt software for years, this is the first time I have done this, and it went relatively well.

Mama Said Sew by Sweetwater for Moda Red and Cream
'Mama Said Sew' by Sweetwater for Moda
The foundations of my colour choice are based on the red and cream colourway in the 'Mama Said Sew' fabric range by Sweetwater for Moda.  As soon as I saw this range, I knew I wanted a piece of it.  Not only is it in a red and cream colourway, but it has an appropriate set of sewing themed fabrics.  I particularly like the little red pinwheels.

Red and White Fabric Charm Squares
I have also gone through all my charm packs, charm squares, and fabric scraps searching for red and cream fabric.  This has included some of the reds from a Bonnie and Camille, 'Bliss' Moda Candy Bar, and some Civil War pre-cut circles I bought at Keepsake Quilting in Meredith, USA, several years ago.  As you can see, nothing is safe - even the tiny little charm squares are in for a shout, especially as a lot of the blocks have very tiny pieces in them.
Red and Cream  White Fabric Stash Fabadashery
Red and Cream / White Fabric Stash

Then finally, the red, cream and white fabrics from my stash.  Lots of red and white spots and dots.  With the project probably taking a few years, no doubt my antennae will be up for red and cream fabrics that are within arms length.

Sunday 3 February 2013

Mini Hexagon Mug Rug

A Morris Tapestry Moda Fabric Hexagon Mug Rug
A Morris Tapestry, Hexagon Mug Rug
As you would have read in my last post, I have been aching to do some sewing this week, and finally I have managed it. Firstly, thanks to Sarah at Sarah Did It for the gentle nudge and inspiration for this Mini Hexi Project, which has kept me quiet for the past 24 hours. I wanted a little hand piecing project, using the English Paper Piecing method, AND I needed to produce a little birthday gift for this Monday, so this little hexagon Mug Rug fits the bill nicely.
English Paper Piecing Templates using Powerpoint
English Paper Piecing Templates in MS Powerpoint

The other night, whilst doing some work on the computer, I quickly popped into MS Powerpoint and drew up some paper templates. I found that the actual 'hexagon' shape in the package did not have equal length sides, so instead combined six equilateral triangles and some lines to make up the hexagons. The sides are 3cm each.

English Paper Piecing Hexagon Templates
I was travelling yesterday and NOT driving, so I seized the moment to start the project. This meant a rather hurried choice of fabric, so I played safe and went for a fabric range I had in my stash.  I was literally cutting out the fabric with my coat on, and the engine running on the car! 
A Morris Tapestry Fabric, MODA, 8172 8177 8176 8171
A Morris Tapestry Fabric, MODA,
(L-R) 8172-15, 8177-17, 8176-15, 8171-34) 
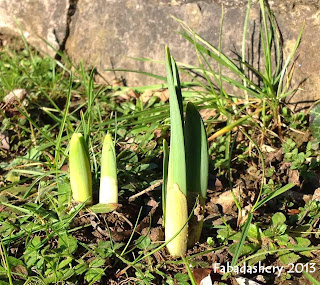
The fabric I chose was from 'A Morris Tapestry' by Barbara Brackman for Moda. They are reproductions of some William Morris (Arts and Crafts Movement) prints from about the 1890's, featuring the Strawberry Thief and a pretty Daffodil print. I thought this was appropriate because, it was a lovely sunny day here today and a chance to see the progress of the Spring DaffodiI bulbs - little way to go yet!  
Daffodil Bulbs February 2013
Daffodil Bulbs - February 2013
During the hour I had in the car, I was surprised to see that I had covered all my paper templates and that they were ready for stitching together.  I tend to use cheap tacking thread in a contrasting colour and stitch right through the paper.  It is the way I have always done it.  I like this method, as you never know how long it will be before you actually are going to stitch it together when you are hand piecing, so they can sit there for years without a worry.

But this project had to be done today. After a little thought, I decided that the easiest way to construct the little Mug Rug was to do it in columns, this avoided any awkward seams, and you can see here the different stages.
With only tiny pieces, it did not take long to piece together, and in no time at all it was time to take the paper out.  This is a picture of the reverse of the mug rug, after it was stitched together, but with the paper still in place.  I tend to give  projects like this a good press whilst the papers are still in place - I find it helps to keep their structure.

Hexagon English Paper Piecing - Reverse
With the papers removed, I pressed out the seam, and made up a quilt sandwich from some scrap wadding, and some fabric for the reverse.  I just did some simple hand quilting, outlining the shapes. If I am hand piecing and hand quilting an item, I usually like to keep the integrity of the piece by banning ALL machine stitching, but lately, once the top is quilted, I have started to machine stitch the edge, to stay stitch the quilt sandwich, which will then be hidden in the binding. I used a straight edge binding.  Again, for this little project I did use the machine to sew on the binding, and then hand stitched it on the reverse. 

Hexi-Puzzle Mug Rug - English Paper Piecing
The good news is that the gift is completed in time, and that I still have the rest of the day to do some stiching!  If you enjoy hand piecing, especially Hexagons, Sarah Did It has a special Hexi Link Up on the 17th of each month - do be sure to join in!
Today I am linking up with Connie at Freemotion By The River and Crazy Mom Quilts.


Thursday 24 January 2013

Fat Quarter Bundle - A Rite of Passage

Cherry Blossom at the Keukenhof Gardens
A few years ago, I visited the Keukenhof Gardens in the Netherlands to see the seasonal beauty of their lovely tulip fields. There were thousands and thousands of beautiful tulips on display, and I took loads of photographs of them. I really recommend a trip in March or April if you have the chance. However, of all the pictures that I took on that holiday, it was this picture of the spring blossom which was my favourite.
Sakura Park, Sentimental Studios, Moda Fabric
Fat Quarter Bundle
A late Christmas present (to myself) arrived this week.  This beautiful, Fat Quarter Bundle, Sakura Park by Sentimental Studios for Moda. The range features cherry blossom flowers and petals, and as you can see, the colours of the fabric are almost exactly the same as the picture I took. As a rule, I don't really go for pastel colours, but I was drawn in by the pretty blossom prints on the fabrics, reminiscent of the cherry blossom, when it comes out in the Spring.
I have had charm packs in the past. I have had a Jelly Roll, but a Fat Quarter Bundle, really feels like a 'rite of passage' in my quilting life. I have had it for several days now, and I still have not untied the knot and dismantle this perfect little package. 


Tuesday 22 January 2013

Bonnie Hunter's Easy Street Quilt - Part 8 Backing

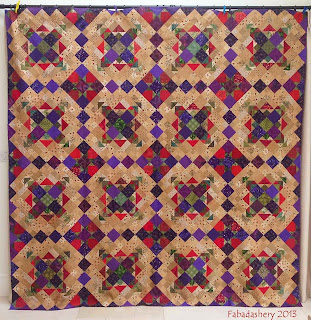
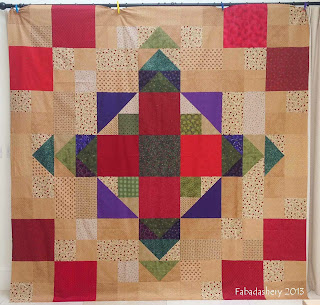
Redundant of having to add borders to my Easy Street Quilt, I moved my attention to the backing.  It's a big quilt, and big quilts need a lot of fabric on the back, as well as the front.  There were no decent sized pieces of fabric left after Easy Street that would do the job, and I was reluctant to buy more fabric, when the project had specifically been a 'scrappy stash buster'.

Fabadashery Easy Street Mystery Quilt Backing
Easy Street Quilt Backing
By the way, 244 quilters Linked Up with their Easy Street Mystery Quilt progress - I bet there were loads more out there working away on their masterpieces. With all the coloured fabric scraps of my Easy Street Quilt still draped around my workroom, it made sense to piece the back together from these pieces. 

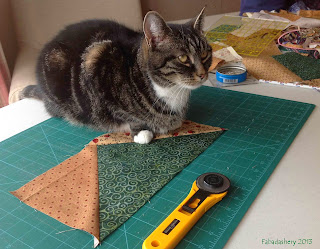
Large Flying Geese Block with Cat
Is now a good time to teach me
how to use the Rotary Cutter?
Working out the sizes for the new sized blocks took a bit of time.  The squares and rectangles were easy enough to size up, but the Flying Geese blocks and Shaded 4 patches were more of a challenge. It really made me appreciate Bonnie's straightforward instructions. I used this opportunity to use the alternate Flying Geese method, using the two different sized squares, instead of cutting strips from triangles.  In addition to this, I decided to swap the red and purple, as I thought I might have preferred on the top.  I also extended the original Block A  outwards by a set of the smaller blocks, making a larger block which can be abstracted from the original Easy Street quilt pattern.  By making the block larger by a row it meant I could use smaller pieces.  I really was at the end of my fabric scraps, and by making the block pieces smaller, it meant I had a more scrappy background.  Going  'large' for the first time has convinced me that a large square cutting ruler from Creative Grids is now a necessity.

I admit I was in two minds about using the left over scraps. Part of me wanted to hold onto them, to use in future projects, then the other part of me felt it was time to move on - the fabrics would be better used in a quilt, than lingering in my stash, going out of fashion. By using them up it would be a good excuse to buy some more.  How do you feel about using up your fabric?

There are a few downsides to this pieced backing approach. With the additional seams, hand quilting is going to be a struggle to say the least, so I guess I have now committed myself to machine quilting the Easy Street quilt . Also, with a mix of lights and darks on the back, choosing a quilting thread colour is likely to involve a lot of deliberation.  I have not even thought about what sort of wadding I will use.

So this is what I have been doing with my time. When we woke up on Saturday, Suzi the cat and I had no idea I we would be piecing another quilt.  It has taken time, but I am pleased with the result. Joining up with Design Wall Monday.


Sunday 20 January 2013

Bonnie Hunter's Easy Street Quilt - Part 8 (Borders and Binding)

I think it is fair to say that Part 8 of the Bonnie Hunter's Easy Street Mystery Quilt involved quite a lot of work, so this is the second instalment of my progress so far.  The top is pieced together, and this weekend I put some time aside to choose the borders and the backing.

Easy Street Quilt Fabadashery Bonnie Hunter Mystery
Easy Street Mystery Quilt

After letting the cogs in my brain do their bit, I have decided not to add further borders.  With the quilt being quite large already, I felt it was large enough, and probably heavy enough, so to finish off the edge of the quilt I have decided to add a very thin, red inset into the binding.  The red adds some intensity to the purple and although only very thin, gives a nice outline.  I have pieced up the red inset from red scraps from 20cm to 70 cm long, and it is ready to go. 

Plans for Bonnie Hunter's  Easy Street Quilt Border and Binding
Plans for Easy Street Quilt Border and Binding
For the binding, I looked to see what I had left over in my stash, and one of the largest pieces remaining was the Sandy Gervais Moda print  'Friendly Folk'.  This looked better than the 'neutral', as the red berries and the green foliage on the print added something, and tied in the red inset strip.  I have enough of this to go around the entire quilt.  Again, it is all pieced together in a strip nearly 9 metres long.

Easy Street Quilt Binding Fabadashery
Easy Street Quilt Binding
These decisions usually take me a very long time, but in the long run it is rarely time wasted.  It also allows the luxury of playing with your fabric stash, as you audition the colours.  With the decision not to add borders to the quilt, it slightly altered my plans for the day, as these will be added once Easy Street has been quilted - no plans for that yet.

Meanwhile, I have been able to enjoy the first of the snow for the winter.  On Friday it snowed all day, with almost 6" settling, with advice to stay off the roads and many schools and offices closed. With the temperature not rising above 0 degrees, the snow is still about, but slowly thawing.

Snow Tutshill January 2013
Snow, January 2013


Wednesday 16 January 2013

Holiday Road Trip - Quilt Shops in Wales

Over the Christmas holidays we took off in our campervan to West Wales, towards Tenby and Camarthenshire for a few days.  As usual, I checked out what goodies could be found along the way, in the way of quilt shops.  As part on my internet research I came across an EXTREMELY useful website by Arnout Cosman, which has listed all the quilt shops, not only in the United Kingdom, but throughout the whole of Europe.  Not only are they listed comprehensively on the website, with maps, but there is also a download file available for your TomTom, Garmin or other GPS navigation system in your car.  As we have driven around Europe in our campervan, I have often dreamt of such a facility ...  As yet, I have not downloaded the file, so I have not tested it out for myself, but I will keep you informed of my progress.  It lists 166 quilt shops in the UK, and 227 in Germany - I think this is where we may be heading in the near future.
Anyway as a result of this find, I picked up a few new shops to visit on our journey, which included Isabeau Inspirations, Patchwork and Quilting Shop.

Isabeau Inspirations Quilt Shop, Crosshands, Llanelli
Isabeau Inspirations Quilt Shop,
Crosshands, Llanelli, Wales
This was a lovely shop, with a good selection of different fabrics including batiks, Japanese, novelty, and a good selection of shades, and tone on tone colours, and very helpful staff.  There was also a very large bead shop, Serendipity Beads, right next door. I picked up a few lovely fabrics whilst I was there.
Serentiy by Anna Fishkin for Red Rooster Fabrics DSN # 22147
(L-R) Serenity by Anna Fishkin for Red Rooster Fabrics DSN # 22147
Michael Miller 'Fairy Frost' D # CM 0376
Panzy Pazazz by Janet Broxon (P&B Textiles, 2006) 
I don't really use pink too much in my work, but I was blown away by this wacky, dotty pink print "Panzy Pazazz" by Janet Broxon (P&B Textiles, 2006).  It is a pink / magenta colour, which is a colour I find quite hard to find usually, and most of the dots and stars on it are in metallic gold.  Its too late for my Pies and Tarts quilt project now, but I can see me squeezing it into lots of my projects from now on.  I also bought some of the Michael Miller 'Fairy Frost' D # CM 0376, in a pink.  I had seen this on the internet, but it was hard to see the reflective nature of it, without seeing it the flesh.  It is a nice tone on tone fabric, with the pattern printed in a 'frosting'. On the left is 'Serenity' by Anna Fishkin for Red Rooster Fabrics DSN # 22147 in pink - I just thought it was pretty.
It is easy to be drawn in by the lovely bright quilting fabrics, so to balance these bright colours in my stash, I also looked for some interesting neutrals.

"My Favourite Things" by Anni Downs of Hatched and Patched Pattern # 7542,
(L-R) "My Favourite Things" by Anni Downs of Hatched and Patched Pattern # 7542,
Henry Glass Fabrics in two tones, and 'Bear Essentials' by P&B Textiles

On the right is the quilt fabric 'Bear Essentials' by P&B Textiles.  The little print reminded me of the plant, Honesty.  The other two are both from the same Henry Glass Fabric range, "My Favourite Things" by Anni Downs of Hatched and Patched Pattern # 7542.  The backgrounds are slightly mottled, with a random allover cross - I don't think you can go far wrong with that.
With the fury of the Easy Street quilt, my fabric stash is in need of a re-think.  I only tend to buy fat quarters or half metres, as I like to stay scrappy, but these small pieces are increasingly difficult to store.  Does anyone have any have ideas that they use?


Wednesday 9 January 2013

Pies and Tarts Quilt - English Paper Piecing

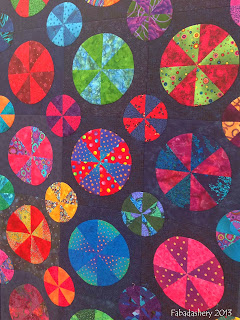
Pies and Tarts Quilt Navy Background Scrap Quilt
Pies and Tart Quilt
Along with piecing my Easy Street Mystery Quilt over the holidays, I have also managed to complete the quilt top for my Pies and Tarts quilt.  This has been a hand piecing project for the past few years, started in February 2011.  The last few bits should have only taken about half a day to do, but Easy Street has rather taken over. When you are hand piecing, completing the top is a major milestone, so I thought I would share this with you.

I was also trying to use my stash and create a scrappy quilt, so I made up some slightly larger cardboard pies and tarts templates from cereal packets, adding on for the seam allowance, for the pies and smaller tarts to draw around for my fabric shapes.  I did a whole 'Pie' and some different sized slices to accommodate some fussy cutting and to use smaller scraps.  I found that a 5" charm square was the perfect size to fit the fabric template for a 'tart'.  As a result of all this circular cutting, a quick sift through my current stash will find fat quarters with awkward round holes in them - no neat strips for this project!

Because I only had a limited number of paper patchwork templates, I tended to cut the fabric in batches, pairing up colour schemes for each circle as I went along.  With a little bag of paper templates, some colourful fabrics scraps, and a needle and cotton, I was on my way.  It travelled with me everywhere, and gradually the Pies and Tarts quilt accumulated.  There are a variety of textured background navy fabrics used in this quilt.

Pies and Tarts Quilt Detail Bright and Navy
Pies and Tarts Quilt Detail

The construction of each block roughly went a bit like this
1. Tack fabric around paper templates
2. Select two sets of four coordinating 'slices'
3. Sew up four pairs of the two colours, overstitching them together
4. Sew the four pairs to make a circle or 'pie'
4. Press the completed circle to ensure a smooth circular edge
5. Applique circle onto a 8" square of navy fabric, removing paper templates as you go.


Pies and Tarts Quilt Navy Background Scrap Quilt
Pies and Tarts Quilt Top Completed
It was only once four blocks were pieced together (by hand, of course!) that it was possible to apply the smaller tart in the middle.  With the verticals and horizontals of the blocks, it was easy to place the circles in the same direction, which adds a diagonal pattern to the whole quilt as well.  I have added half circles to the edge, and to finish the edge I will be adding a very narrow navy border.

At this stage I am joining up with Finish It Up Friday  and HeLP for Hexiaholics - the next stage is to put it away for a while whilst I decide on the quilting pattern I will use, and it waits its turn to be hand quilted ....


Sunday 6 January 2013

Bonnie Hunter's Easy Street Quilt - Part 8 (nearly)

As soon as I pressed 'Publish' on my last blog post, I returned to my sewing machine to continue with my Easy Street quilt, only to find it had gone on strike, and the little workhorse was not responding.  After checking the 'troubleshooting' section in the handbook, and all the online forums, I still had no luck, so yesterday it went to the Sewing Machine Doctor. I am waiting for the diagnosis ... Anyway, never fear, I pulled out my Husqvarna Designer 1 Embroidery Sewing Machine, and continued on that.  It works fine, but I had got used to the single needle plate, had sussed out my 1/4" seam allowance, and had wound a bunch of bobbins. And now I am having to work without it, I really appreciate the Pfaff IDT (duel feed).

There is nothing quite like a 'Link Up' to motivate you on a project, so knowing that everyone will be sharing their progress on the Easy Street Mystery Quilt on Bonnie Hunter's Quiltville Blog, here is my offering.
Bonnie Hunter's Easy Street Mystery Quilt
Easy Street Quilt - Block Layout
As you can see, all my blocks are complete, and this is the layout of the quilt.  As you may also see, at the time of writing, they have not been joined together, but probably by the time you read this, they will be!  Also, the instructions for Part 8 mention something about borders and a backing.  No plans yet, but you will all be the first to know when there are developments on that front.
Am I pleased with my colour scheme? Yes, I am.  Naturally, with hindsight and several hours on my Electric Quilt software, I might have changed a few things, but this was a mystery quilt, and I surrendered to the process, and enjoyed it thoroughly.

I always find with scrap quilts that you have to keep your faith in the scraps.  Sometimes a fabric may not feel right, but when mixed in with the rest,  it ends up being the essential 'player' which prevents the quilt looking bland. This was my 'not so sure' fabric.
I wanted to include it because of its whimsical sewing motifs, but it contained a little bit of WHITE, and it's background was insipid in contrast with my other warm toned fabrics. Turns out it is the one adding the much needed depth to the background fabrics.  On the other side of the coin, the 'Sing a Song of Christmas' print by Woodrow Studio, was the one which I had to hold back on.  With its pretty glitter, I wanted it all over, but I held back, and there is just enough to catch the light as the when quilt moves.
'Sing A Song of Christmas' Woodrow Studio Fabric
'Sing A Song of Christmas' Woodrow Studio
Today, I am also introducing Sparky, the other cat.  Sparky is not as interested as Suzi in the actual process of patchwork and quilting, but once he can see that all the activity is close to becoming a quilt to sleep on, he starts to take a very REAL interest.  There was a time when he would rolling around, rather than sitting on the quilt - I think he is thinking the same thing ...
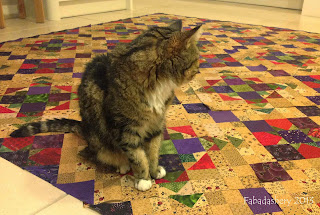
Bonnie Hunter's Easy Street Mystery Quilt with Cat
Sparky on Easy Street

As a reminder, this is only my second machine pieced quilt, and my very first Mystery Quilt. I have really enjoyed the Mystery Quilt process, made all the better by sharing the journey with quilters all around the world.  Knowing that most of you have been working as hard as I have to get this done has really motivated me. return to work tomorrow, where I know it is going to be very busy, so I have been keen to get as much done on Easy Street as possible. You can see my progress for each part on the links below
A big THANK YOU to Bonnie for taking the time to plan it and put it together. You have made a lot of people very happy.
PS: Don't forget that Bonnie's instructions will be taken down from her site in June 2013.