Showing posts with label Cat. Show all posts

Saturday 9 March 2013

Nearly Insane Quilt - Block 47

Block 47 Nearly Insane Quilt (Red and White)
Another  block completed.  I am really pleased with the colour choices I made for Block 47 of the Nearly Insane quilt, I think they are so pretty.  Not a difficult block, but yet again, no name. The more blocks I do, the more particular I am becoming about my colour choices and what contibution it will make to the overall quilt.
Cat wearing Elizabethan Collar, helping with patchwork
Sparky wearing Elizabethan Collar, helps with Block 47
I am really enjoyed sitting down and doing some hand piecing.  I have also had the company of Sparky whilst I cover my papers.  He is wearing a rather stylish 'Elizabethan Collar' (popularised by Elizabeth I, and Lady GaGa, no less!), as he has recently been to the V-E-T.  Sparky has always had 'special' eyes, so special that the V-E-T has decided to keep one for herself.  He is coping really well with his new monocular vision, and is much brighter than before his visit to the V-E-T.  He is keen to scratch the healing wound, so until we are confident it won't be harmed, the fashion accessory remains.  Nevertheless, his company is always welcome whilst I am sewing. Joining up with Feline Friday


NUMBER OF PIECES: 36
DIFFICULTY: 2/10
SMALLEST PIECE: Square, 1/2" (12.5mm) x 1/2" (12.5mm)
LARGEST PIECE: Triangle, 1 3/8" (35mm) x 1 3/8" (42mm) x 2" (50mm)
TECHNIQUE: English Paper Piecing (EPP)
FABRICS: Tried and True Raindrops Garnet(04273) by Nanacy Halvorsen, Benartex
Northcote Range, by Cabbages and Roses #35204 -21 by Moda
Check The Bias Apple Red #5495-11 Mama Said Sew by Sweetwater for  Moda
Tiny Flower Print (Unidentified)
 

Monday 4 March 2013

Nearly Insane Quilt - Block 71 Chimney Sweep / Album Block

The spring flowers are starting to show their faces, especially with the first few days of warm spring weather, so I thought I would capture the moment with Block 71 against some 'Tête-à-tête' in the garden.

Block 71 Nearly Insane Quilt, Spring 2013
For Block 71 of the Nearly Insane Quilt, I have used just two fabric colourways, both spots, to build up this block which is constructed similar to using bricks to build a wall. With the right colour choice, this cross pattern emerges, but I guess you could equally use different scraps for each piece, for a really scrappy looking quilt block, which would be fun.

This block has already escaped a few dodgy moments during its early life. Its little 'travel' bag slipped during a car journey and all the pieces fell out across the car. It was only when the block was together that I breathed a sign of relief, knowing I had not lost any. 

Cat inspects Block 71, Nearly Insane Quilt Red and Cream
Suzi the Cat inspects Block 71, Nearly Insane Quilt
Then I took the block for Suzi to inspect.  She took particular interest in this one and was keen to test how robust it was.  Unfortunately, I had to step in before she was able to complete her quality control process.  She loves the crunch of the paper used in the English Paper Piecing method - perhaps a little too much. 
Cat English Paper Piecing method Nearly Insane Quilt
Suzi the Cat inspects Block 71
So far I don't seem to have reached the 'insanity' of this quilt - YET.  I know it is still to come, but this block was easy.

PS: Surely, THIS block must have a name!
( Edit: Sandie at has identified this block as an Album Block, which could be added to a quilt with space for signature.  A little further research has uncovered that it is also called 'Chimney Sweep' block. Thanks for your contribution)

NUMBER OF PIECES: 29
DIFFICULTY: 1/10
SMALLEST PIECE: Triangle, 1" (25mm) x 1 11/16" (17mm) x 1 11/16" (17mm)
LARGEST PIECE: Rectangle 3 1/8" (77mm) x 1" (25mm)
TECHNIQUE: English Paper Piecing (EPP)
FABRICS:  Apple Red Snaps #5497 Mama Said Sew by Sweetwater for Moda
"Polka Party Petite" (Buttercream) "Lakehouse Dayz" Collection by Holly Holderman, Lakehouse Drygoods (LH05037)

Joining up with Design Wall Monday at Patchwork Times and Connie over at Freemotion By the River to share my progress on my Nearly Insane Quilt.

Friday 22 February 2013

Fabadashery Blog - 3 Month Anniversary Milestones

Have you seen my post "Bonnie Hunter's Easy Street Quilt - Part 8 (nearly)"?  Reviewing my Blogger Stats recently, I noticed that it has had 2000 hits since it was posted in January.  This past week has been the 3 month anniversary since I started this patchwork and quilting blog, and along with the increase in traffic, a lot of things have happened.

The first event marking this weeks 3 Month celebrations was the arrival of a little parcel from the United States.  It was the Giveaway Prize that Suzi the Cat had won on Feline Friday at Sarah Did It!  Isn't she a clever cat - winning fabric for her owner!  This is the first Giveaway Prize we have won on the internet. These two pieces are from the 'Ivory Cats' Collection by Lesley Anne for Quilting Treasures, and look ideal for a future cat mat project. 

'Ivory Cats' by Lesley Anne, for Quilting Treasures, 2011
There is was also a bar of chocolate in the packet.  Yum Yum.  I was not the only winner though.  Enclosed in the parcel was a special homemade patchwork Cat Nip toy in a Zip Lock bag.  When I opened it I was over the moon for Suzi, not only was there the toy, but also the bag - she loves to chew on plastic.... 
Cat Nip Toy with yummy Zip Lock Bag
Stage 1
Feline Friday Cat Nip Toy
Stage 2
Feline Friday Cat Nip Toy
Stage 3 - FRENZY!
Needless to say - Suzi is CRAZY for it, and loves having it rubbed all over her face. She says thanks especially to Pepper, Midge and Squeaky, the Stars of Feline FridayAlso thanks to their Mum, Sarah for prompting me to sort out my 'No Reply Blogger' status - I hope everyone finds it easier now. 
The celebrations continued when I popped over to the Quilt Room blog.  Pam and Nicky Lintott have made their name through designing and publishing books on Jelly Rolls, Charm Packs, Layer Cakes and other pre-cut fabric bundles, and are in the process of pulling a new book together.  A few weeks ago they had a competition to name one of their quilts for their forthcoming book.   The name I submitted was 'Jet Stream Jewel', and the quilt name was chosen for a Runner's Up Prize!   Not only do I have a £10 voucher to spend on fabric, but they also hope to use the name for one of the other quilts featuring in their forthcoming book.  I can't wait to see it.

So a great Anniversry so far. The concept of blogging is not new to me, but it was Bonnie Hunter's Easy Street Mystery Quilt over at Quiltville, which was one of the main motivators for getting me started on publishing a regular sewing blog. That whole experience of piecing a large quilt by machine, sharing the experience with people all over the world, and being part of the 'Mystery Quilt' phenomenom has been an exciting journey, and has allowed me to plug into the sewing world in a whole new way.

Up until now, most of my patchwork and quilting projects have been by hand, and so their progress is slow, which makes newsworthy moments few and far between - not ideal for an active blog. I am sure the hand stitchers and hand quilters out there can empathise with this.  Knowing that I need to put up a post regularly is a real motivator for keeping my sewing projects on track and making me focus on completing projects.  And most of all I enjoy it.

What have been the highlights of your blogging? I would love to hear about your adventures in the blogging world. 

Sunday 17 February 2013

Red and White Pinwheel Quilt - Hand Quilting

As I mentioned in a previous post, my hand pieced Nearly Insane Quilt is a portable project for when I am on the move.  If I have some quilting time at home, I am catching up on the backlog of quilts that need hand quilting. 

Suzi the Cat on the Red and White Pinwheel Quilt
This weekend, I have managed to put in quite a few hours of hand quilting to another of my red and white projects - my Red and White Pinwheel Quilt.
Hand Quilting Red and White Pinwheel Quilt
The top of the Red and White Pinwheel Quilt was English Paper Pieced (EPP), started in early 2009, and the top was completed in March 2011.  A bit of a quilting backlog has built up in the past few years, so I decided to do this one first as it is only a single quilt, and I thought it would get finished more quickly.  At the moment, I am simply outlining the red pinwheels, and I have designed a pattern for the centre of the blocks.  I am sure the remaining quilt pattern will evolve over time. I have managed to put in a good few hours of hand quilting, but it never seems to move on quite as quickly as you hope.
As I have moved my way around the quilt, outlining the red pinwheels, I have come across a few rogue paper templates, even though I thought I had removed the all the papers before I made up the quilt sandwich.  So in addition to quilting, I have had to unpick a few seams to extract the paper and then ladder stitch the seam together again.

English Paper Piecing red and white pinwheel
Rogue paper templates !!!

Is there anyone else out there working on some hand quilting?

Friday 15 February 2013

Broken Dishes Quilt - Cat Mat

Finding useful opportunities for expressing your quilting creativity is sometimes a challenge.  I love making full size quilts, but the backlog of quilt tops that need quilting in my cupboard is a reminder that large projects are not always the most appropriate project to launch into.  A Mug Rug is fun, but to the other extreme, as they can be small and fiddly.  The alternative - the Cat Mat.

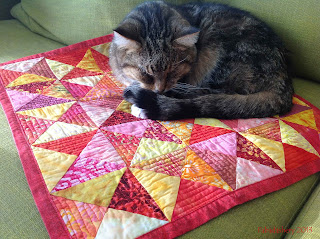
Sparky the Cat on Broken Dishes Pattern Cat Mat Batiks
Sparky the Cat on Broken Dishes Cat Mat
This is Sparky the cat modelling my most recent Cat Mat using the Broken Dishes quilt block pattern.  I enjoy making this size project as I find that the size of a Cat Mat offers more scope to test out new quilting patterns, and to practice some different machine quilting techniques.  Best of all they actually get used, all day, every day, by the cats, as they are placed in strategic places around the house.  Also, they can be thrown into the washer easily.
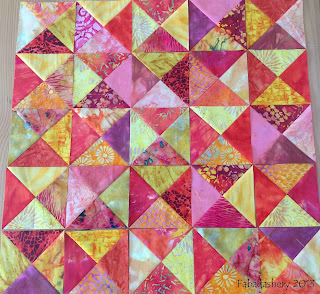
This particular project used 5" batik charm squares in a mix of yellow, orange, red, pink and purple. The mat finishes up 18" square, with the finished quarter square triangles being 3.5". To create the contrast that builds up the Broken Dishes pattern, I made up some quarter square triangles, pairing up light and dark squares, front sides together.  I then marked a diagonal cross on the lighter fabric, as a guide for sewing.  The dashed lines on the diagram show where I machine stitched the two squares together with a 1/4 " seam allowance, the solid line shows where I cut them, once stitched on the machine.
Quarter Square Triangle Unit Pattern
Quarter Square Triangle Unit
Once sewn and cut, you have sets of light / dark triangles, which then need to be paired up into the squares, which can be seen on the far right of this picture.

Quarter Square Triangles  batik fabric
Quarter Square Triangles - half way through!
With the squares complete, plan the layout, making sure the lights and darks are next to each other throughout.  I find that taking a picture on my iPhone or iPad at this stage is a useful reminder of the layout, as once I start lifting up the pieces for sewing on the machine the blocks easily get mixed up!

Broken Dishes Quilt Pattern Layout Batik Fabrics
Broken Dishes Quilt Pattern Layout 
For this mat, I backed it with a red fabric, which I cut larger than the final size, so that the backing fabric could be brought forward onto the front for the binding, which I machined in place, after I had quilted the mat. As I said before, these mats are ideal for improving your free machine quilting techniques, and on this one I filled the darker triangles up with a smooth zig-zag pattern, which followed the graduating shape of the triangle.  

Broken Dishes Quilt - Backing and Binding Batik
Broken Dishes Quilt - Backing and Binding
I love the Broken Dishes pattern.  I think it is especially great for using up scrap fabrics, the pattern is quite dynamic, and I particularly like quilts which have the same repetitive pattern throughout.  I don't profess to be ther greatest machine quilter, and I have had no complaints about the quilting so far, but then Sparky's eyesight is not too great ...
 

Saturday 2 February 2013

Virtual Sewing Progress

This week I have spent more time thinking about sewing than actual doing any.  I have been working all day, as well as evenings this week, and sewing just has not had a look in. My journeys to work in the car have been spent dreaming of projects I want to do, of fabric I would need to buy for them, and lamenting the lack of time I have had in my sewing room.  Since Suzi became an 'internet sensation' by winning the Feline Friday giveaway at the Sarah Did It Blog, she has behaved like a winner of X Factor, but even she is missing the special time we share in the sewing room.

When life gets too hectic for sewing, there are places on the internet that I always seem to head off to for an instant fix.  The Fat Quarter Shop, to review their What's New section, to Green Fairy Quilts, to marvel at the incredible long arm quilting skills of Judi Madsen, and the list of bloggers that I follow.  Are there places that you head to for some virtual sewing?
 
Thank heavens for Blogland.
 

1. I have been posting my blog for just a little over two months, and this week I reached 21 Followers.  This means that Damsel Creations, the kind-hearted blogger who was the first Fabadashery Follower, has been moved to a second page. Just to say thank you for leading the way - you are not forgotten!

2. This week a blogger, Zipje and Zopje from the Netherlands, got in touch to regarding my Butterfly Quilt, as her sewing bee group are just about to start the same quilt.  Do visit to watch their progress.  It is a great quilt to make.

3. Sarah at Sarah Did It has been posting the progress of a lovely hand pieced Hexagon project, and kindly suggested a 'Mini Hexi Puzzle' for those of us who were jealous in need of a quick fix of hexies. By Thursday night I had cut out the papers ... 

4. Finally, too much time spent on the Internet has introduced me to projects that I never knew I needed to do, and they are posted here on my Pinterest page.  The one that has been dominating my mind is the 'Nearly Insane', Salinda Rupp quilt, published in a book by Liz Lois.  I am pretty much sure that this is the next major hand piecing project I am doing, confirmed that I ordered the book from the USA over a week ago - it arrived this morning.


Tuesday 22 January 2013

Bonnie Hunter's Easy Street Quilt - Part 8 Backing

Redundant of having to add borders to my Easy Street Quilt, I moved my attention to the backing.  It's a big quilt, and big quilts need a lot of fabric on the back, as well as the front.  There were no decent sized pieces of fabric left after Easy Street that would do the job, and I was reluctant to buy more fabric, when the project had specifically been a 'scrappy stash buster'.

Fabadashery Easy Street Mystery Quilt Backing
Easy Street Quilt Backing
By the way, 244 quilters Linked Up with their Easy Street Mystery Quilt progress - I bet there were loads more out there working away on their masterpieces. With all the coloured fabric scraps of my Easy Street Quilt still draped around my workroom, it made sense to piece the back together from these pieces. 

Large Flying Geese Block with Cat
Is now a good time to teach me
how to use the Rotary Cutter?
Working out the sizes for the new sized blocks took a bit of time.  The squares and rectangles were easy enough to size up, but the Flying Geese blocks and Shaded 4 patches were more of a challenge. It really made me appreciate Bonnie's straightforward instructions. I used this opportunity to use the alternate Flying Geese method, using the two different sized squares, instead of cutting strips from triangles.  In addition to this, I decided to swap the red and purple, as I thought I might have preferred on the top.  I also extended the original Block A  outwards by a set of the smaller blocks, making a larger block which can be abstracted from the original Easy Street quilt pattern.  By making the block larger by a row it meant I could use smaller pieces.  I really was at the end of my fabric scraps, and by making the block pieces smaller, it meant I had a more scrappy background.  Going  'large' for the first time has convinced me that a large square cutting ruler from Creative Grids is now a necessity.

I admit I was in two minds about using the left over scraps. Part of me wanted to hold onto them, to use in future projects, then the other part of me felt it was time to move on - the fabrics would be better used in a quilt, than lingering in my stash, going out of fashion. By using them up it would be a good excuse to buy some more.  How do you feel about using up your fabric?

There are a few downsides to this pieced backing approach. With the additional seams, hand quilting is going to be a struggle to say the least, so I guess I have now committed myself to machine quilting the Easy Street quilt . Also, with a mix of lights and darks on the back, choosing a quilting thread colour is likely to involve a lot of deliberation.  I have not even thought about what sort of wadding I will use.

So this is what I have been doing with my time. When we woke up on Saturday, Suzi the cat and I had no idea I we would be piecing another quilt.  It has taken time, but I am pleased with the result. Joining up with Design Wall Monday.


Sunday 6 January 2013

Bonnie Hunter's Easy Street Quilt - Part 8 (nearly)

As soon as I pressed 'Publish' on my last blog post, I returned to my sewing machine to continue with my Easy Street quilt, only to find it had gone on strike, and the little workhorse was not responding.  After checking the 'troubleshooting' section in the handbook, and all the online forums, I still had no luck, so yesterday it went to the Sewing Machine Doctor. I am waiting for the diagnosis ... Anyway, never fear, I pulled out my Husqvarna Designer 1 Embroidery Sewing Machine, and continued on that.  It works fine, but I had got used to the single needle plate, had sussed out my 1/4" seam allowance, and had wound a bunch of bobbins. And now I am having to work without it, I really appreciate the Pfaff IDT (duel feed).

There is nothing quite like a 'Link Up' to motivate you on a project, so knowing that everyone will be sharing their progress on the Easy Street Mystery Quilt on Bonnie Hunter's Quiltville Blog, here is my offering.
Bonnie Hunter's Easy Street Mystery Quilt
Easy Street Quilt - Block Layout
As you can see, all my blocks are complete, and this is the layout of the quilt.  As you may also see, at the time of writing, they have not been joined together, but probably by the time you read this, they will be!  Also, the instructions for Part 8 mention something about borders and a backing.  No plans yet, but you will all be the first to know when there are developments on that front.
Am I pleased with my colour scheme? Yes, I am.  Naturally, with hindsight and several hours on my Electric Quilt software, I might have changed a few things, but this was a mystery quilt, and I surrendered to the process, and enjoyed it thoroughly.

I always find with scrap quilts that you have to keep your faith in the scraps.  Sometimes a fabric may not feel right, but when mixed in with the rest,  it ends up being the essential 'player' which prevents the quilt looking bland. This was my 'not so sure' fabric.
I wanted to include it because of its whimsical sewing motifs, but it contained a little bit of WHITE, and it's background was insipid in contrast with my other warm toned fabrics. Turns out it is the one adding the much needed depth to the background fabrics.  On the other side of the coin, the 'Sing a Song of Christmas' print by Woodrow Studio, was the one which I had to hold back on.  With its pretty glitter, I wanted it all over, but I held back, and there is just enough to catch the light as the when quilt moves.
'Sing A Song of Christmas' Woodrow Studio Fabric
'Sing A Song of Christmas' Woodrow Studio
Today, I am also introducing Sparky, the other cat.  Sparky is not as interested as Suzi in the actual process of patchwork and quilting, but once he can see that all the activity is close to becoming a quilt to sleep on, he starts to take a very REAL interest.  There was a time when he would rolling around, rather than sitting on the quilt - I think he is thinking the same thing ...
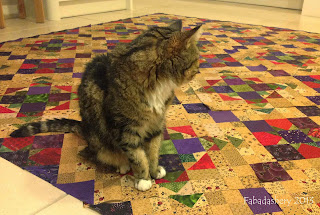
Bonnie Hunter's Easy Street Mystery Quilt with Cat
Sparky on Easy Street

As a reminder, this is only my second machine pieced quilt, and my very first Mystery Quilt. I have really enjoyed the Mystery Quilt process, made all the better by sharing the journey with quilters all around the world.  Knowing that most of you have been working as hard as I have to get this done has really motivated me. return to work tomorrow, where I know it is going to be very busy, so I have been keen to get as much done on Easy Street as possible. You can see my progress for each part on the links below
A big THANK YOU to Bonnie for taking the time to plan it and put it together. You have made a lot of people very happy.
PS: Don't forget that Bonnie's instructions will be taken down from her site in June 2013.

Wednesday 2 January 2013

Bonnie Hunter's Easy Street Quilt - Part 7

Easy Street Mystery Quilt Part 7
"It says Part 8 will be released TOMORROW!"

It is not an understatement to say that it was not only Suzi the Cat who was alarmed at the Rapid  Fire Release of the final parts of Bonnie Hunter's Easy Street Mystery Quilt.  By the end of Monday I had completed Part 6, and just before I went to bed I printed off Part 7 -were we in for a shock!  It was too late to do anything, so  I went to bed knowing I had all of Tuesday and Wednesday to catch up.
The next day, joining the Flying Geese and blocks didn't take long, as Bonnie promised, and that allowed us to layout the pieced triangles in our colourway of red, purple, green and tan, for the first time. 

Cat with Easy Street Quilt Part 7
Easy Street Quilt Part 7
 
By 10 o'clock Part 8 had been released and so we had a sneak preview of the next stage.  Bonnie produced the BIG REVEAL.  Her quilt looks lovely, and the green and greys look great together. I was curious to how all these little quilt blocks we have been creating over the past few weeks were going to look in my colourway, so instead of completing my 'homework' for Part 7, I skipped forward to Part 8 to make one each of the two blocks which will make up the whole of the Easy Street Mystery Quilt.  Knowing what lies ahead, I have started to set up some chain piecing that will make lighter work of constructing the quilt.  Mine are in need of a bit of a trim and I don't have one of those HUGE square quilter's rulers - does anyone have any tips on how to square up the blocks without one?

Today I have gone back to complete the previous stage, so I have now officially completed Part 7 of Easy Street, joining the Flying Geese to the blocks, and making both sets of corner triangles, and  all the edge triangles / edge fillers.  From this picture you can see how my colour scheme is turning out.

Bonnie Hunter's Easy Street Mystery Quilt Part 7 and Part 8
'The Little Reveal' Easy Street Mystery Quilt

Sunday 16 December 2012

Bonnie Hunter's Easy Street Quilt - Part 4

Part 4 of Bonnie Hunter's Easy Street Mystery Quilt has been out for a few days now, and it is only today that I have been able to dedicate a few hours to getting it completed. 
Pfaff 2058 Sewing Machine - Flying Geese, Easy Street Quilt
Easy Street Quilt - Flying Geese
This time round we need to cut Flying Geese blocks, using the same colour for the large 'goose' as we used for Part 2, but using theTurquoise (= RED) for the wings.  I am glad I wrote out my colour scheme clearly in  my post a few days ago, it has been a VERY useful reference, to ensure that I have been using the right colours. Luckily, for Part 2 of the Easy Street Quilt I had cut surplus Flying Geese, so most of that cutting had been done.  I am now confident using the Creative Grids  45 / 90 degree ruler for strips, and so the cutting out for this part has not been so daunting. 


Part 4 - Bonnie Hunter's Easy Street Mystery Quilt
Part 4 - Easy Street Mystery Quilt
Once the Flying Geese have been constructed, the next step has been to attach them to the other set of Flying Geese that we made, to make a square block.  I made a few to start off with to check I knew what I was doing, and now have the weekly production line in operation.

Part 4 - Bonnie Hunter's Easy Street Quilt with Cat
Suzi the Cat admires Part 4 of the Easy Street Quilt
When Part 4 was revealed on the Quiltville Blog, I was excited to see that we can now cut into our next colour, for me, this is PURPLE.   It has been a busy few days, so my usual slot for completing Bonnie Hunter's Easy Street Mystery Quilt, has been usurped by chores such as Christmas shopping and some extra work I have taken on leading up to Christmas. Also Suzi the Cat has not been in the mood for patchwork, whereas she is usually a great source of encouragement.  She is not very amused that I am using her chair as a 'design wall' either.

Sunday 9 December 2012

Bonnie Hunter's Easy Street Quilt - Part 3

Removing cat hair from fabric
I started the day knowing I had to cut a lot of pieces of fabric, so I thought I would do a bit of housekeeping before I started.  Suzi has adopted the role of my 'fabric manager' , so I needed to remove her cat fur from where she has been sleeping keeping guard.  The most effective way I have found to do this is to put on my Marigold's and rub them across the fabric.  Suzi's cat fur is not as prolific as the other cat, so there was not too much to remove.  
Removing lint from cutting mat
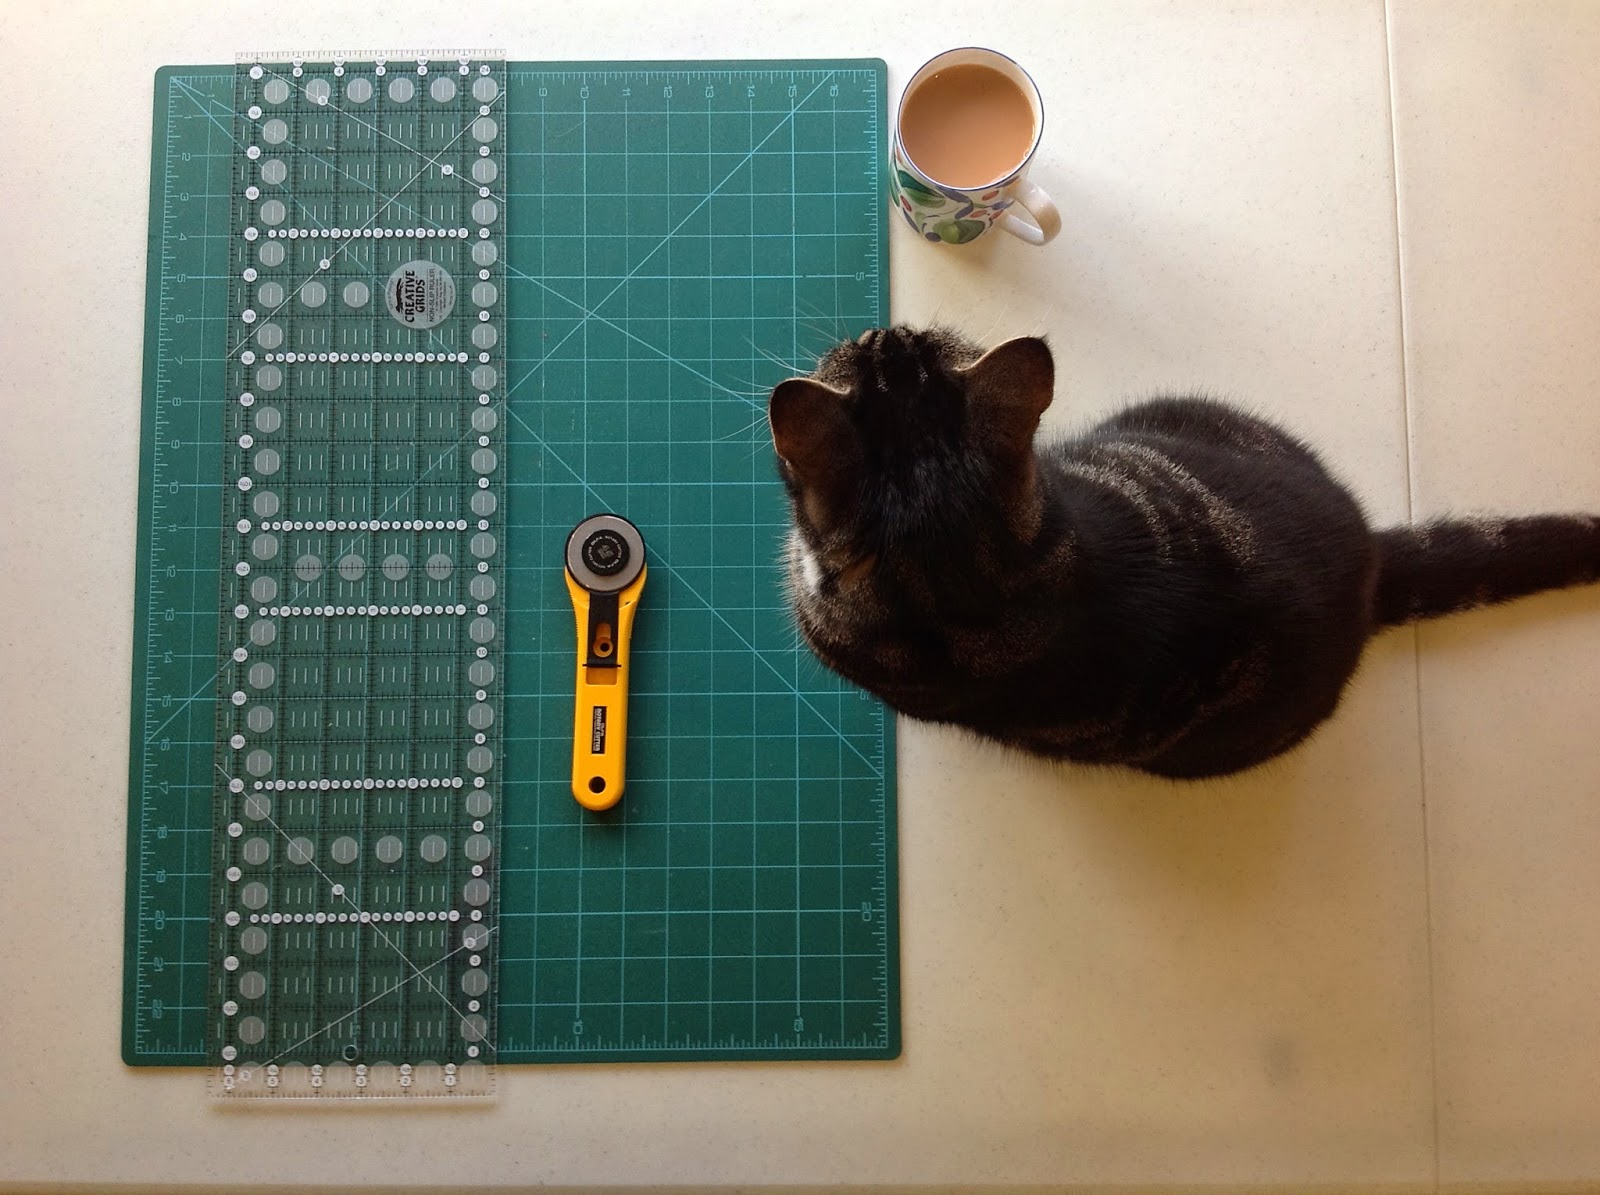
I have also been fastidiously trimming my blocks for the Easy Street Mystery Quilt, and a lot of it has been tiny slithers of fabric, which disappeared as I cut them off.  I have found the same rubber glove technique works nicely to remove the lint that gathers up on my self-healing cutting mat.  Once I had tidied up, we sat down and read the instructions with a cup of tea.

Suzi cat helping with cutting fabric
Before I cut the whole batch, I cut out a few pieces, to check that it worked. It is the first time I have made a block like this before.  As usual, I followed Bonnie's instruction, and the blocks have come out fine.  By lunchtime all the cutting was done, and by teatime all the blocks were pieced, ready for trimming whilst I watched 'Strictly Come Dancing'. For some reason I cut way too many red triangles, so I will wait to see if I can use them or work out another project to use them up.
I was pleased to be using a different colour.  I am using for red fabric for Bonnie's turquoise, for this part, and for this colour my stash has plenty of choice.  The latest addition to my red stash has to be the most perfect fabric - a red dotty tone on tone which is from a Moda Collection "Christmas Past" #1457, by Polly Minick and Lauri Simpson.  I bought a large piece of it, knowing that I will want to include it in every quilt I ever make.  Another favourite in there is a crimson floral tone on tone fabric, from the 'Oriental Traditions' range designed by Adam Guan for Robert Kaufman.  This piece is getting smaller and smaller with each project, and I think this quilt will use up the last of it.  However, as this is a scrap quilt, it is an opportunity to scatter in some of those prints which are perhaps not my 'favourites' too.
 

Friday 7 December 2012

Easy Street Mystery Quilt - Part 3 Released

Bonnie Hunter has released the third part of the Easy Street Mystery Quilt today.  The weeks sure go fast, but so far I have kept up with the pace.  This week we have to produce shaded 4 -patches.  I have never made these little blocks in my life, but I am using this Mystery Quilt as an exercise in getting my machine quilting skills up to scratch, and so another week, another string to my patchwork bow.

We are allowed to use another colour this week, Turquoise.  I have a different colour scheme, and up until now I haven't finalised whether her Turquoise is my Red or Purple.

Easy Street Mystery Quilt with Cat
Suzi chooses Red for the Easy Street Mystery Quilt

However, it looks like Suzi the cat has chosen for me.  Clearly the one I want will be the one she is sleeping on - so it is Red.  I have loads of Red.  I love Red, and it goes in all my quilts. This one will be no different ....
Suzi is joining in the Feline Friday Link today, so be sure to visit all the Internet Kitties.

Sunday 2 December 2012

Bonnie Hunter's Easy Street Quilt - Part 2

 
Bonnie Hunter's Mystery QUilt  Easy Street Part 2 Flying Geese Units
Easy Street Quilt - Part 2 Flying Geese Units
Here are some of my 128 Flying Geese Units that are required for Part 2 of Bonnie Hunter's Easy Street Mystery Quilt.  I am using GREEN where Bonnie is using PURPLE at this stage, mainly because it is the colour I have least of.  My cutting seems to be OK, as my finished units are working out the right size.

Flying Geese Units - Strips
Already I am loving the way my colour scheme is working out. Here are some of the green strips I have cut out.  I have snuck in a sparkly fabric, "Sing a Song of Christmas" by Woodrow Studio, some Primitive Gatherings for Moda, and the 2002 Classic Cottons range, of which I seemed to have plenty.

I have made Flying Geese before, by a different method, and was quietly dreading the prospect when I saw the Easy Street Part 2 instructions on Friday, as before I had found that my corners frequently went down the black hole of my sewing maching, chewing up the fabric.  However, a MAJOR penny dropped when I realised I needed to use a single hole sewing machine plate, instead of a zig-zag plate. 

Pfaff 2058 Sewing Machine Zig Zag Plate and Single Hole Plate
I had read about it, but had never acknowledged its importance.  The next challenge was, how was I going to get hold of one in order to keep up with the weekly Easy Street Quilt tasks?  I didn't know what I was looking for.  Then another MAJOR penny dropped.  When I purchased my Pfaff 2058, it came with a bonus Quilters Toolbox.  But where was it?  I checked online to see what was included in the kit, and sure enough Pfaff included a single hole plate.  But WHERE was it?  I checked all the usually places, but with no joy.  Since buying the machine, we have moved house, and most of Friday and Saturday were spent pulling everything out to find this 2" square piece of metal.  Yes, I finally found it.  It was in the side pocket of sewing machine trolley. Sew far, sew good - no fabric down the black hole.  I also changed the blade in my Rotary cutter - that improved things too!

I don't follow Bonnie's Scrap User's System (a scrap in  my book starts when it is less than 2" square), but Suzi the cat and I watched her very informative video on her Quiltville blog, and decided to construct the Flying Geese Units in the same way.  Since we are meant to be shopping our stash, I also used the rulers I already had.  I prefer to use the Creative Grids range, and have the Multi-Size 45 / 90 degree Triangle for making Half and Quarter Square Triangles from Strips.  From what I can gather, this one ruler does what the Easy Angle and Companion Angle rulers do together.  I did a few samples, checking the lines I was following, and the units came out to be the right size.

Multi-Size 45 / 90 degree Triangle for making Half and Quarter Square Triangles from Strips, Creative Grids

 
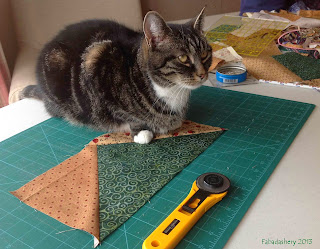
Not all of them are sewn together yet, but most of the cutting is done. I had a few obstacles along the way. Here is Suzi the cat sitting on my cutting mat, just as I am about to cut another strip. You may be able to see the blur of her tail moving - this is usually moving within inches of the Rotary Cutter!
 

Tuesday 27 November 2012

Pies and Tarts Quilt - Final Slices

Pies and Tarts Quilt
Pies and Tarts Quilt - Final Slices

At the weekend I had a lazy Sunday afternoon, sitting in front of the television watching the final race of the Formula 1 2012 Season from Brazil, with Sparky the cat on my lap, hand sewing the last slices of my Pies and Tarts quilt together. I started English paper piecing my Pies and Tarts Quilt in February 2011, so this marks the end of an era.  These are the small 'tarts', which will be appliqued up to the edge of the quilt.
What does this mean?  It means that I do not have a hand piecing project on the go at the moment.  This is probably a good thing, as it means I will have to concentrate on hand quilting some of the quilt sandwiches that are waiting for my attention.

Monday 26 November 2012

Easy Street Part 1 - Mystery Quilt

Suzi Cat on Easy Street Quilt Fabric

'I think it is time you made your decision ...'

 
I have been putting off making the FINAL colour choice decision for Part 1 of Bonnie Hunter’s Easy Street Mystery Quilt, but my assistant, Suzi the cat, insisted that I start it today, in order to keep up with everyone.  Suzi only joined us in April, but already she is a VERY keen quilter.

My final decision was to use the tan ‘Kansas Troubles’ print from the ‘Back to the Prairie 2 - 9195’ Moda range, for Bonnie’s grey (yes, it is grey here in the UK) .  I don’t think I have the full yardage for this, but I think I will have enough for Part 1 of Easy Street.  Any remainder, I can supplement with some other scraps from the same range, which I have. Let’s hope I get away with it.

The background fabric is made up of similar tan based fabrics, but with prints all over them.  Again, a lot of my scraps are from the Kansas Troubles ‘Christmas’ range from a few years ago which I purchased as a lovely fat quarter bundle from Sunflower Fabrics.  There is also a lovely Sandy Gervais 'Friendly Folk' Moda print in there for which I have about 2 yards.
The 2 inch strips from these scraps have varied from a full bolt width to 4 inches – so no scrap is safe.  The other colours will be red, green and purple.  The key thing was to ‘shop my stash’, which I should be able to do for 90% of the quilt.
Easy Street Mystery Quilt Sewing Machine

I have been quilting for several years, but all my quilts have been hand stitched and hand quilted. Machining a quilt together has not really entered my radar, until recently, and I am using the Easy Street Mystery Quilt, to bring me up to speed. Using the machine is much quicker, but I do like to get my seams accurate.  Sew far, sew good. Bonnie’s tips about how you feed your units, and the pinwheel seam were great.
Part 1 Easy Street Quilt - Twosies
Part 1 Easy Street Quilt Twosies

Part 1 Easy Street Quilt 4-patch


With my scrappy scraps, I am having to cut in batches, to ensure that I still have a good mix of backgrounds for later on, as I don't have a clue how much I am using. So far I have done about 50 units, but have some more time today and tomorrow to get this first step finished.  Everso pleased that I have got started on this. I wonder what pattern it will end up to be?